Welcome to the 4RTY WOT Map Guide
Feedback/Comments? Email Skycommand3r4rty@gmail.com
|
|
Welcome to the 4RTY WOT Map Guide Feedback/Comments? Email Skycommand3r4rty@gmail.com
|
 Maps Maps
|
|
|
|
|
|
|
|
|
|
|
|
|
|
|
|
|
|
|
|
|
|
|
|
|
|
|
|
|
|
|
|
|
|
|
|
|
|
|
|
|
|
|
| Abbey South | Abbey North | |||||||
 |
|
 |
||||||
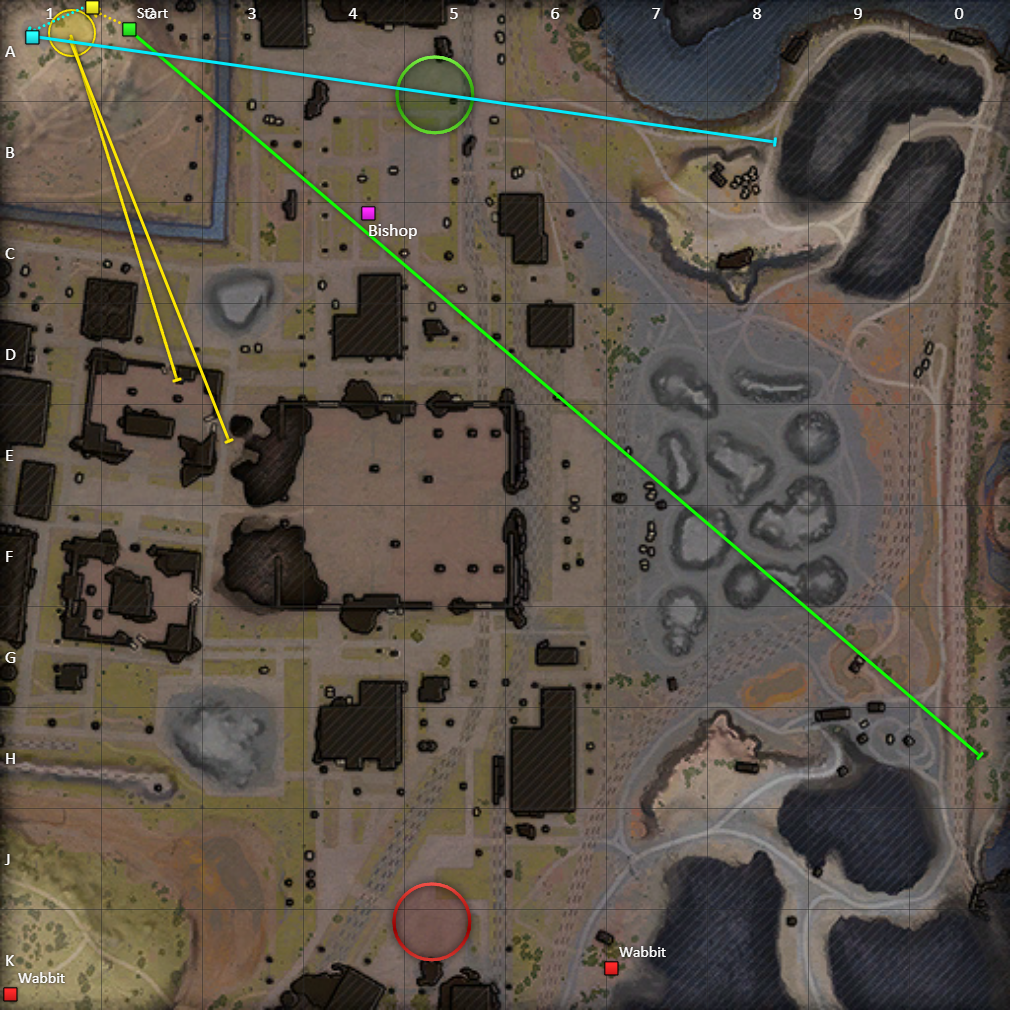
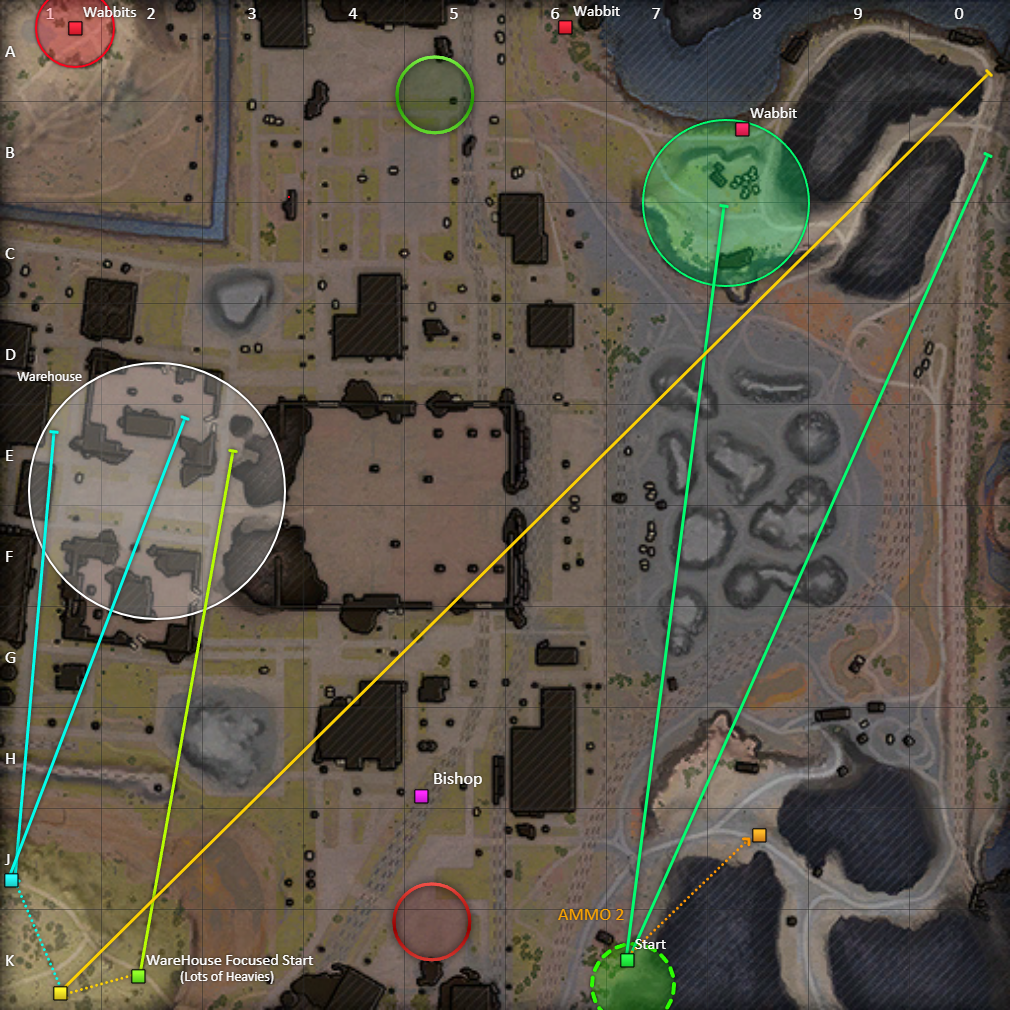
| Airfield West | Airfield East | |||||||
 |
|
 |
||||||
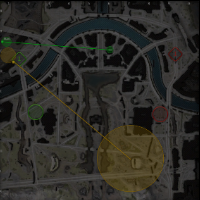
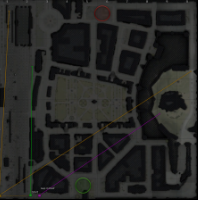
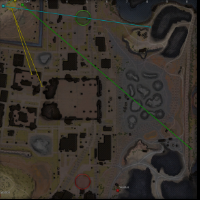
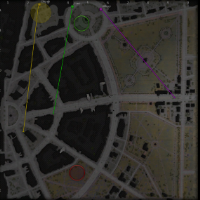
| Berlin West | Berlin East | |||||||
 |
|
 |
||||||
| Cliff North | Cliff South | |||||||
 |
|
 |
||||||
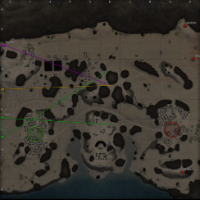
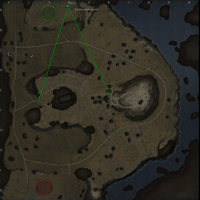
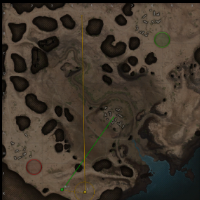
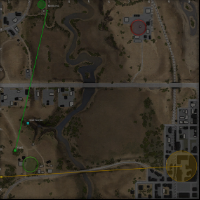
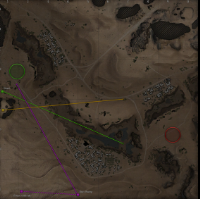
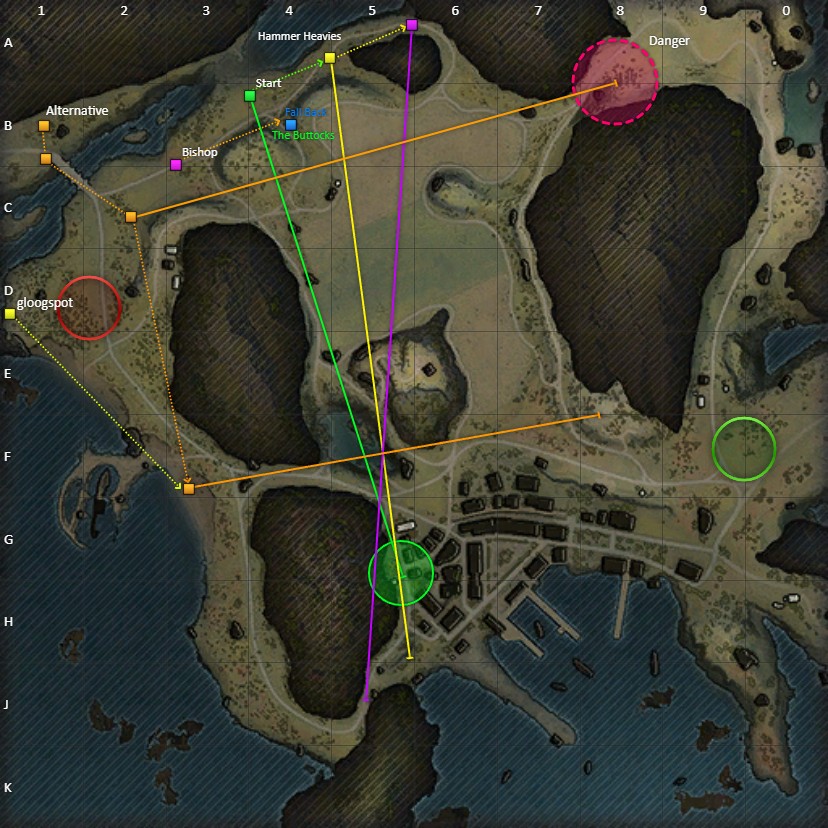
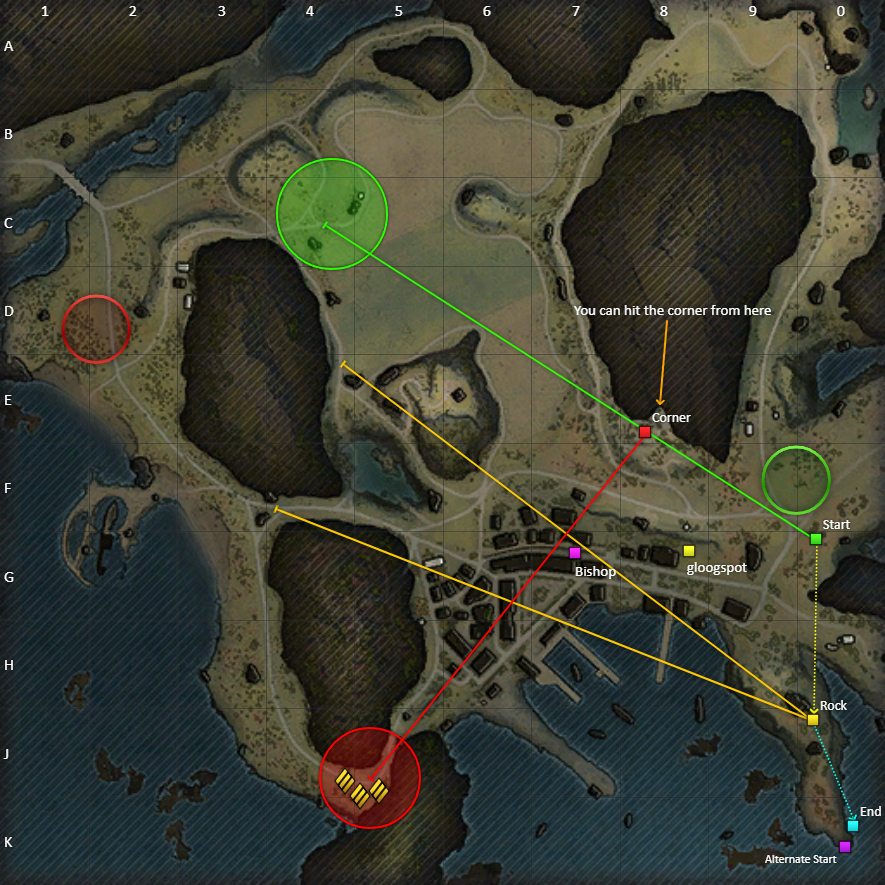
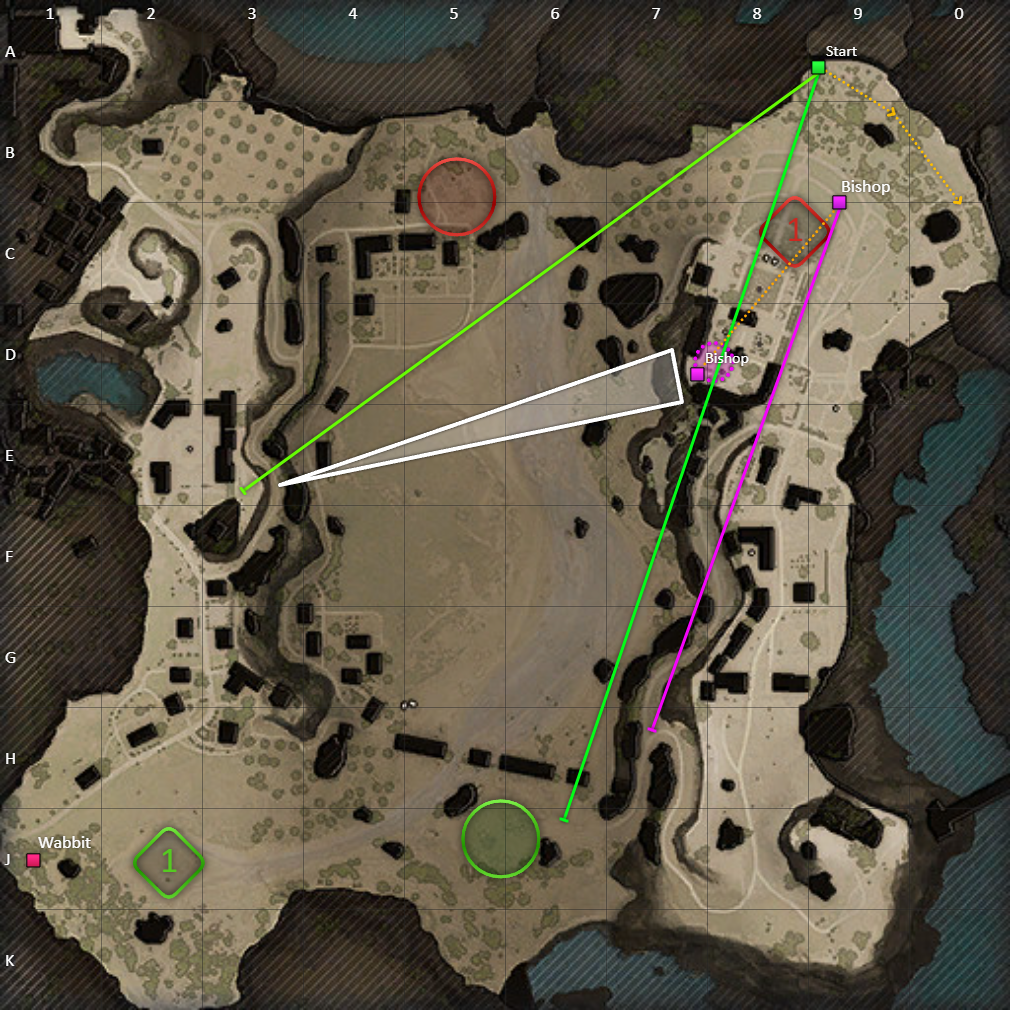
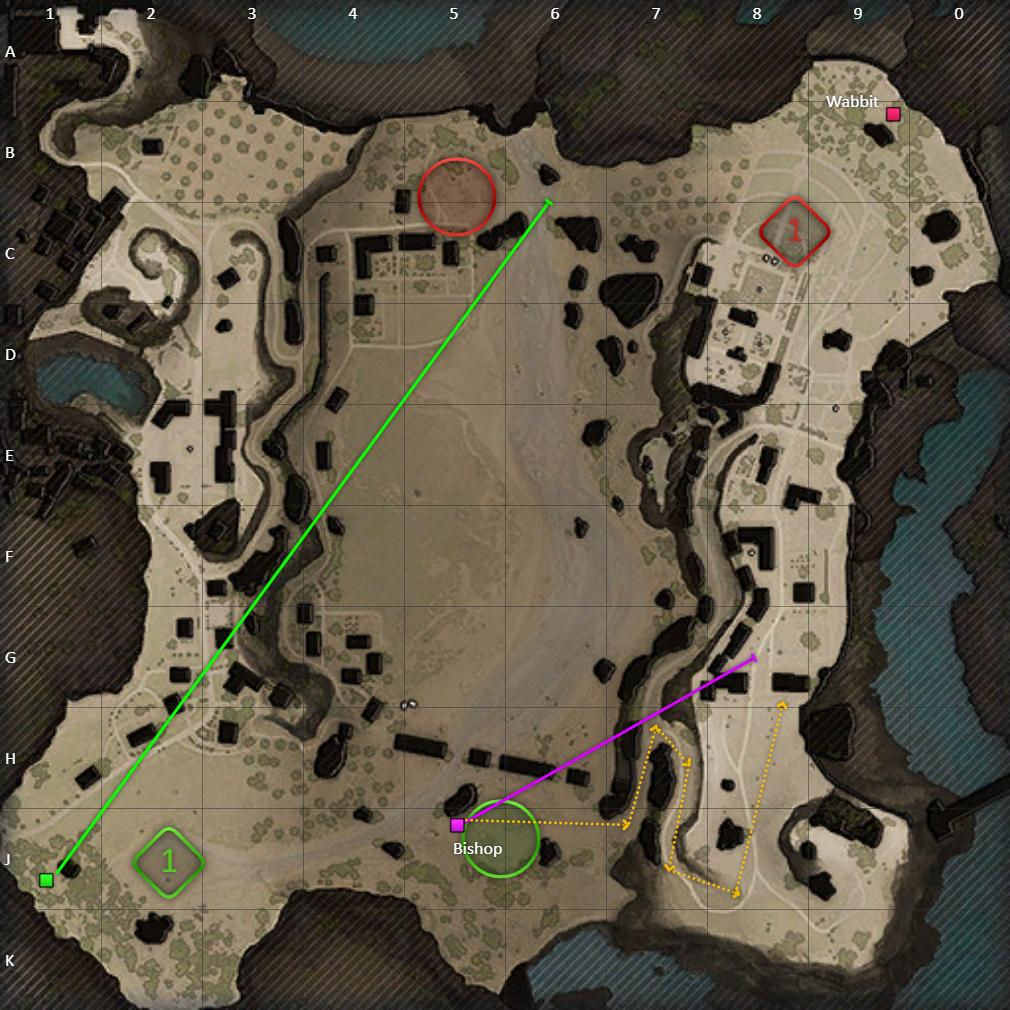
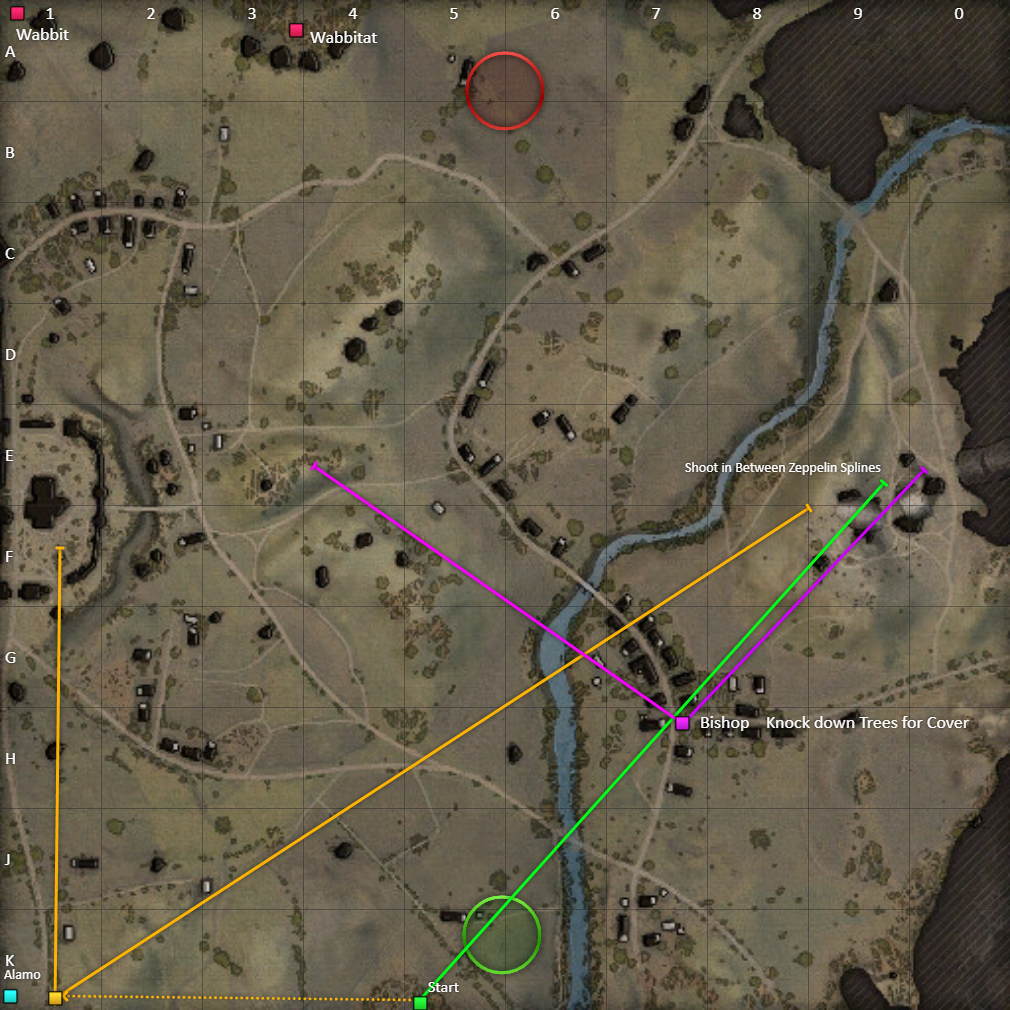
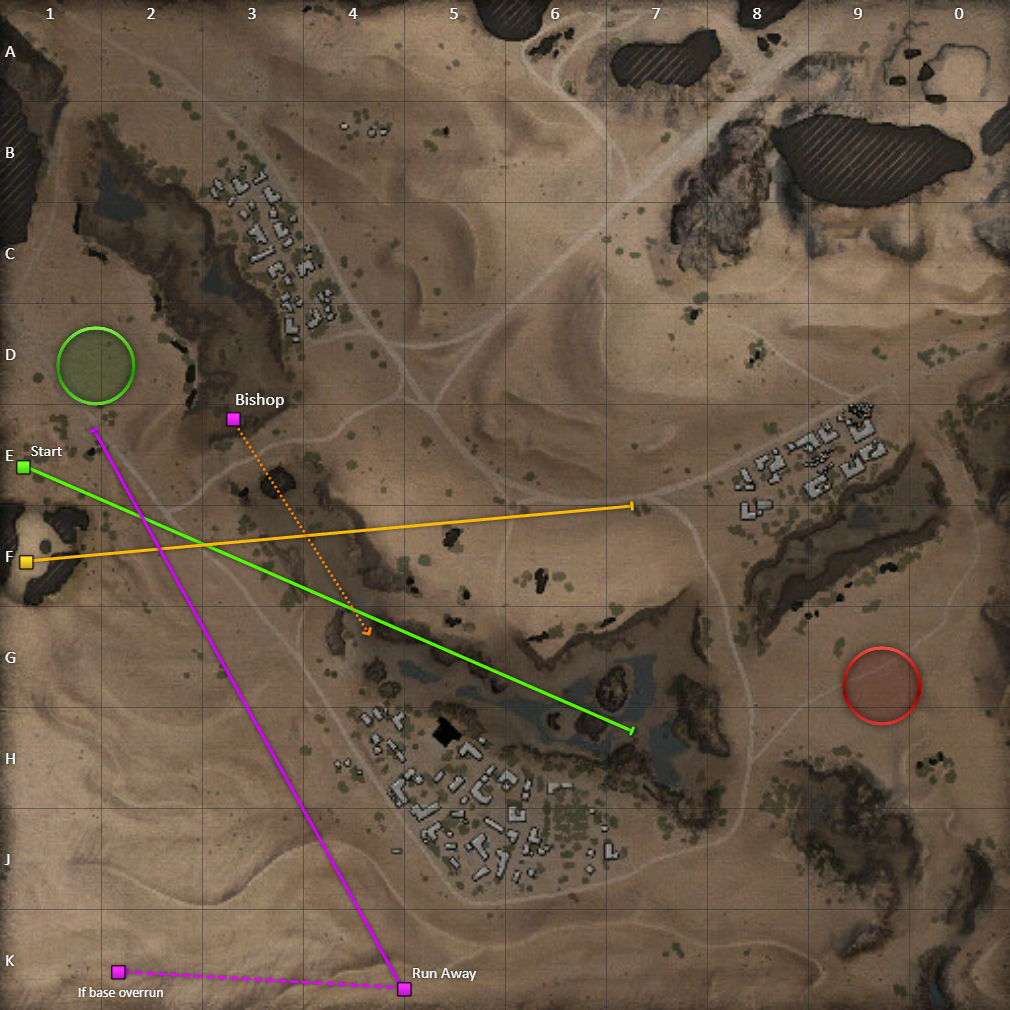
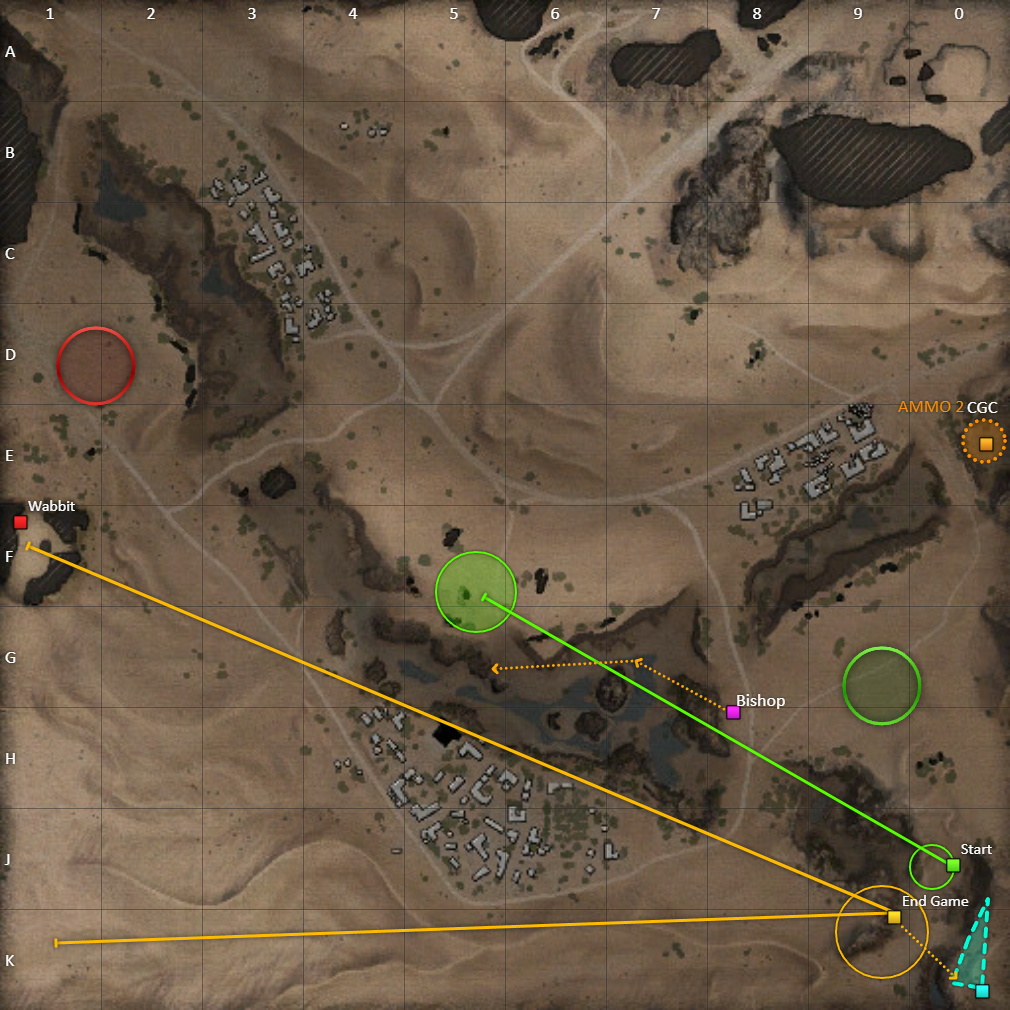
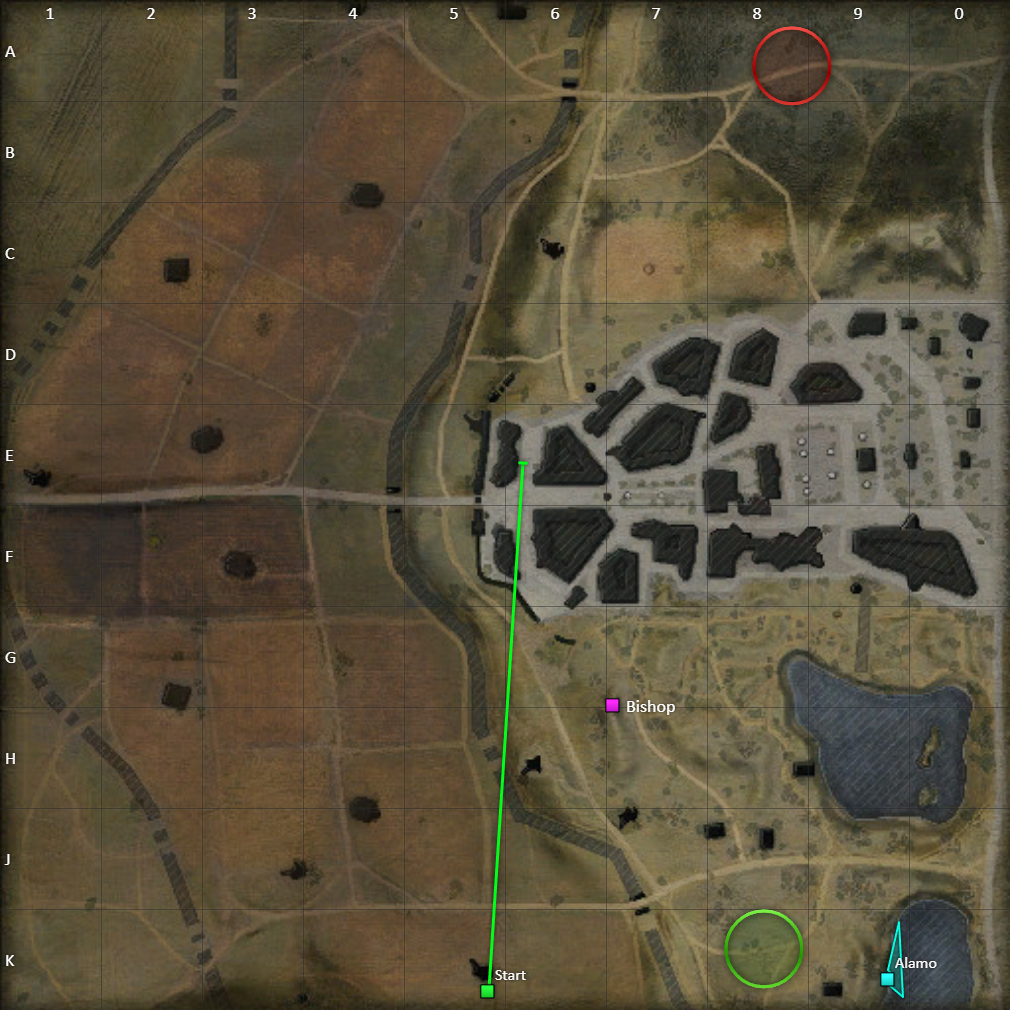
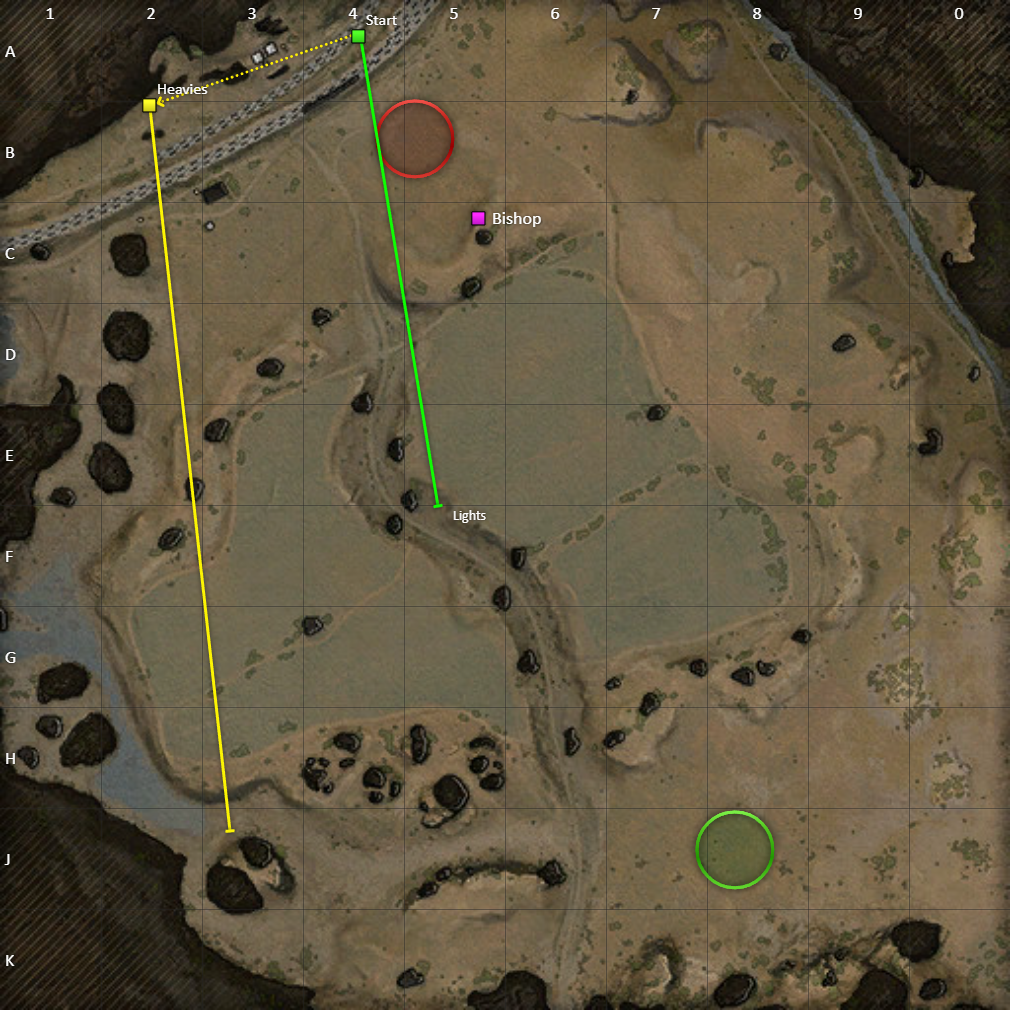
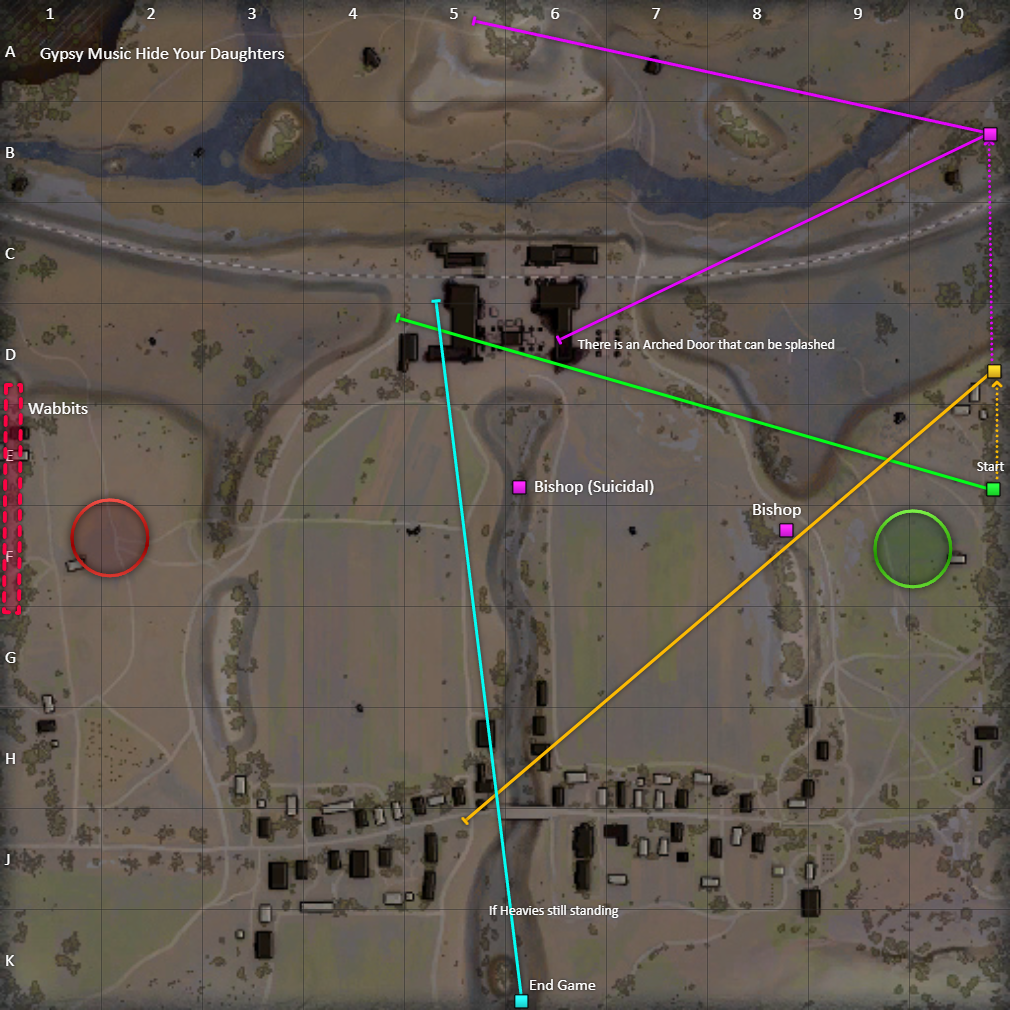
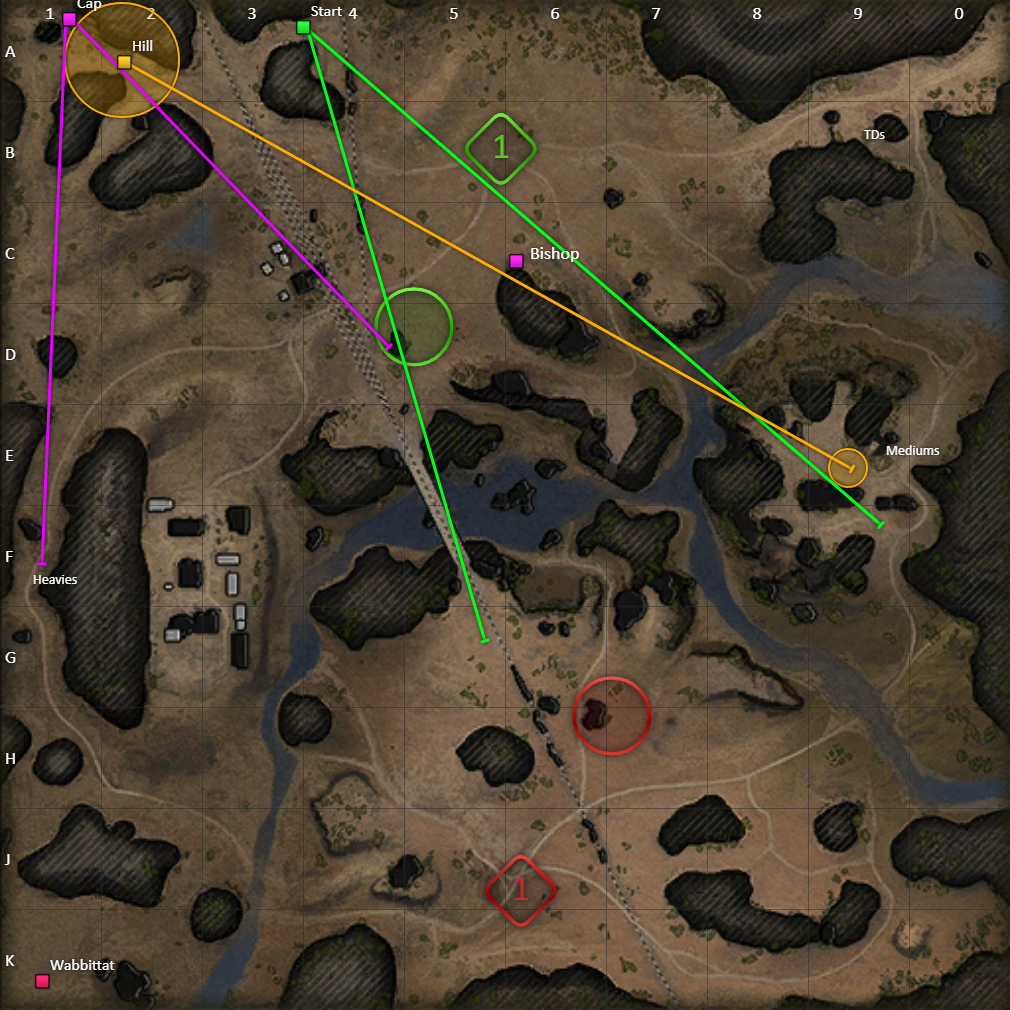
| El Halluf South West | El Halluf North East | |||||||
 |
|
 |
||||||
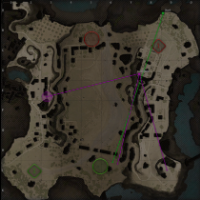
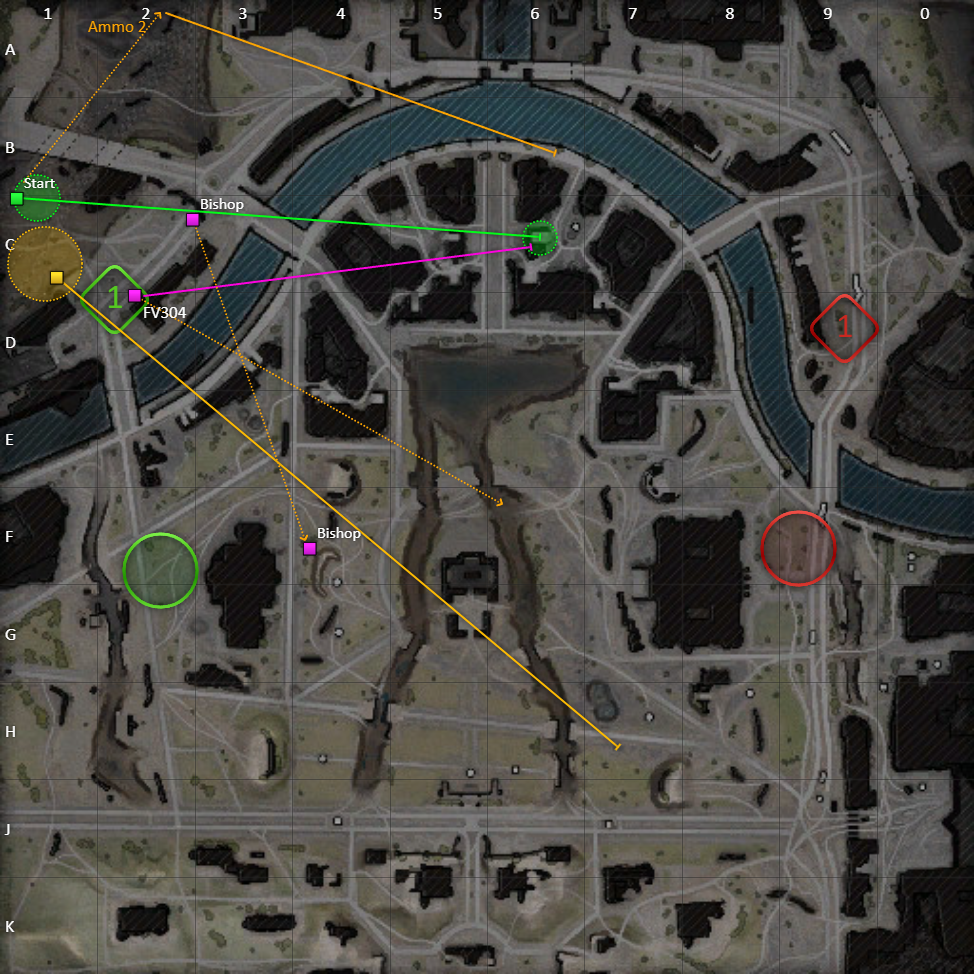
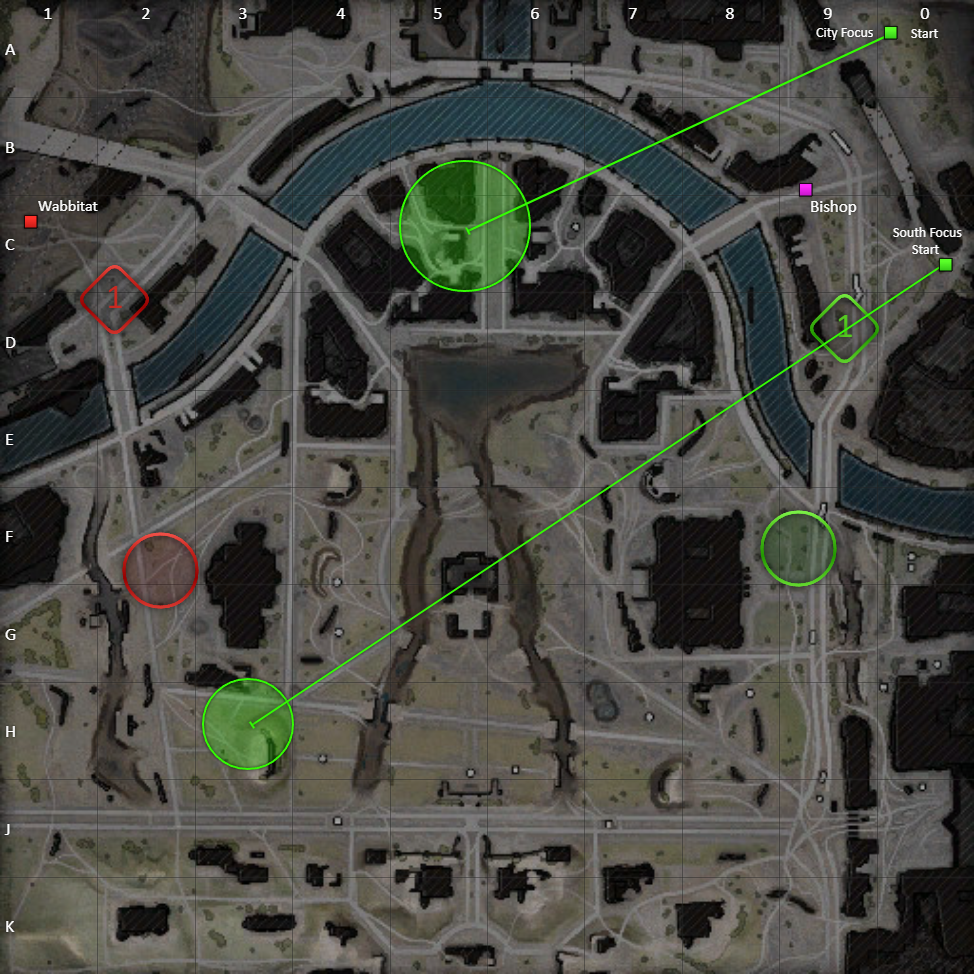
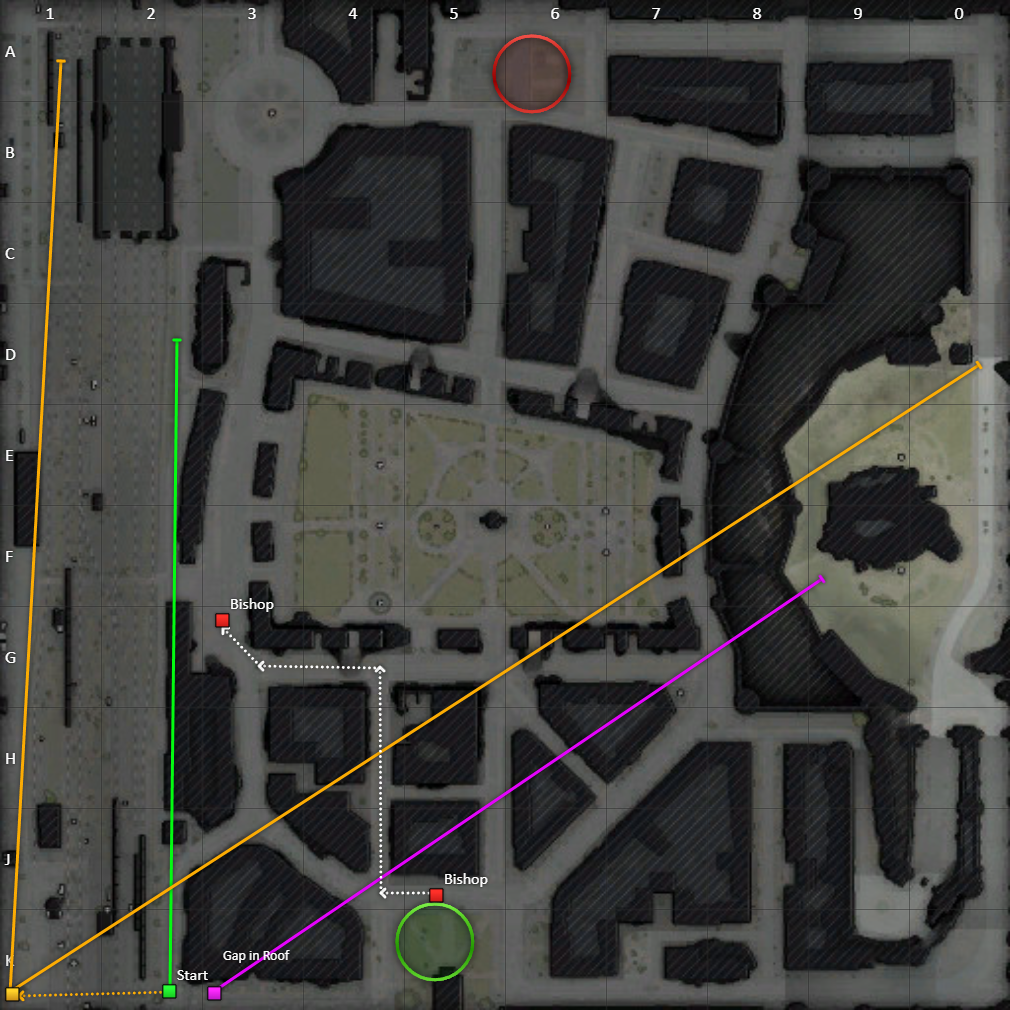
| Empire North West | Empire South East | |||||||
 |
|
 |
||||||
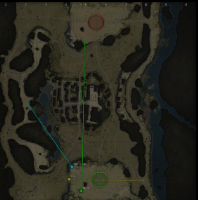
| Erlenberg South | Erlenberg North | |||||||
 |
|
 |
||||||
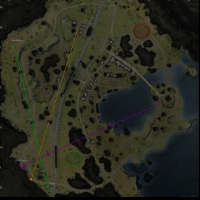
| Fishermans's Bay North | Fishermans's Bay South | |||||||
 |
|
 |
||||||
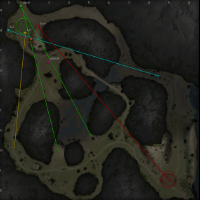
| FJords North West | FJords South East | |||||||
 |
|
 |
||||||
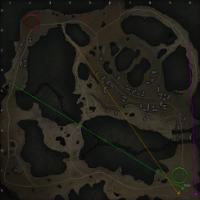
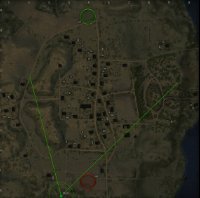
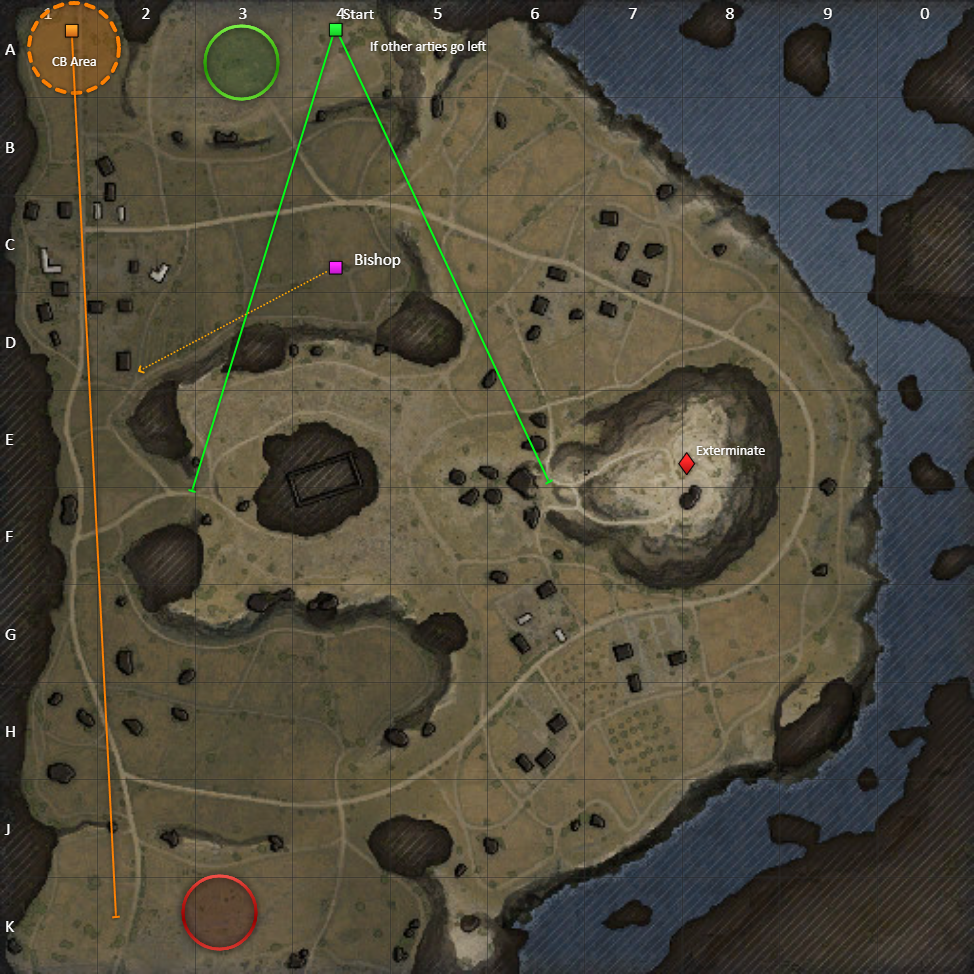
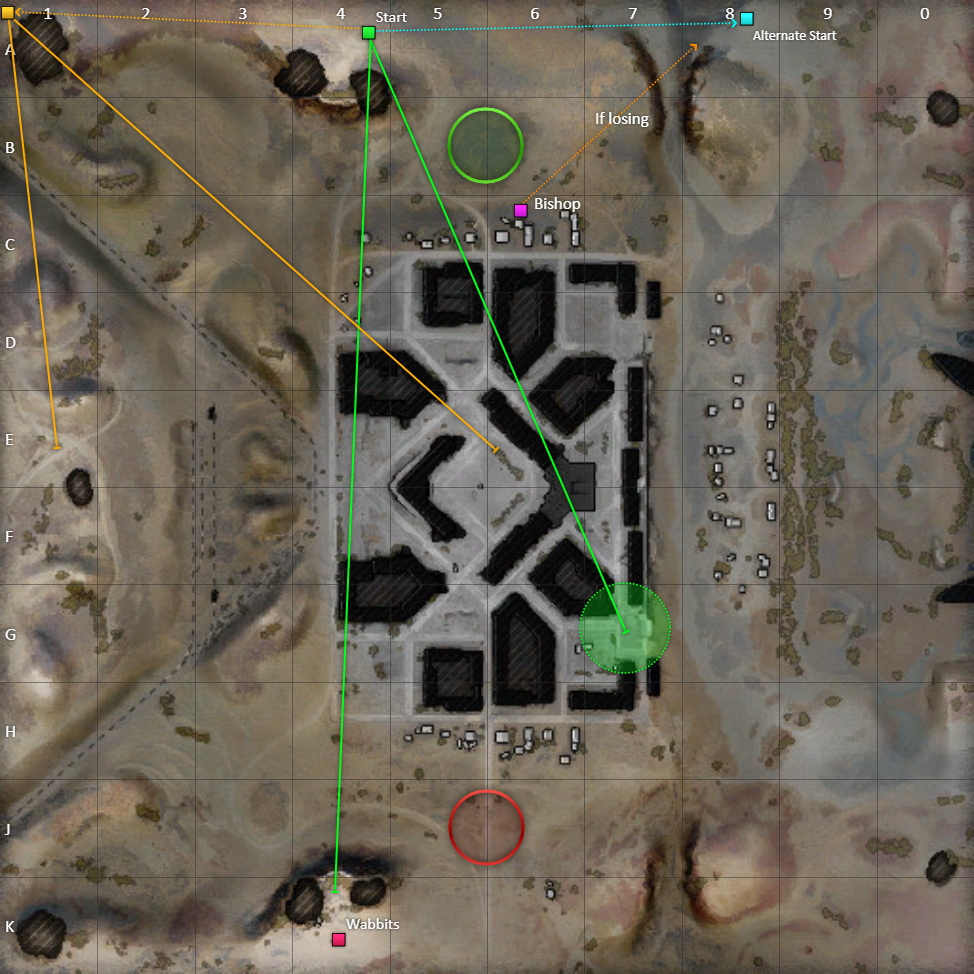
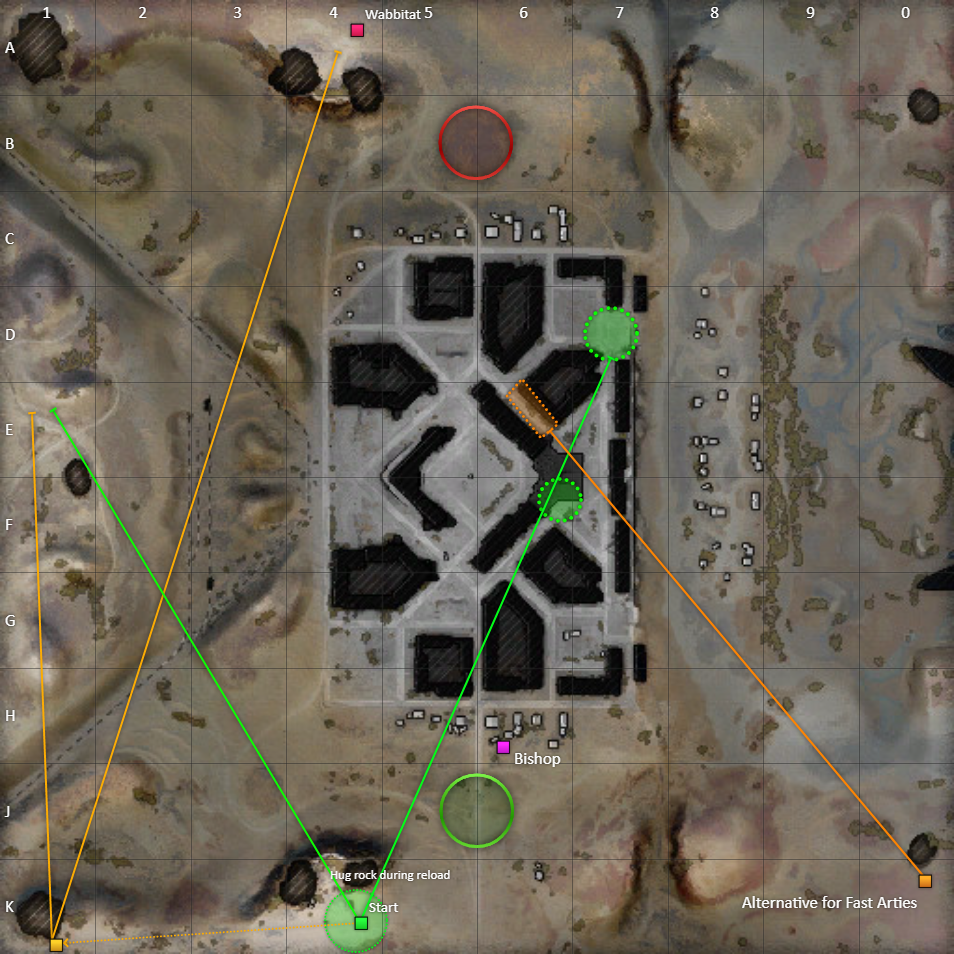
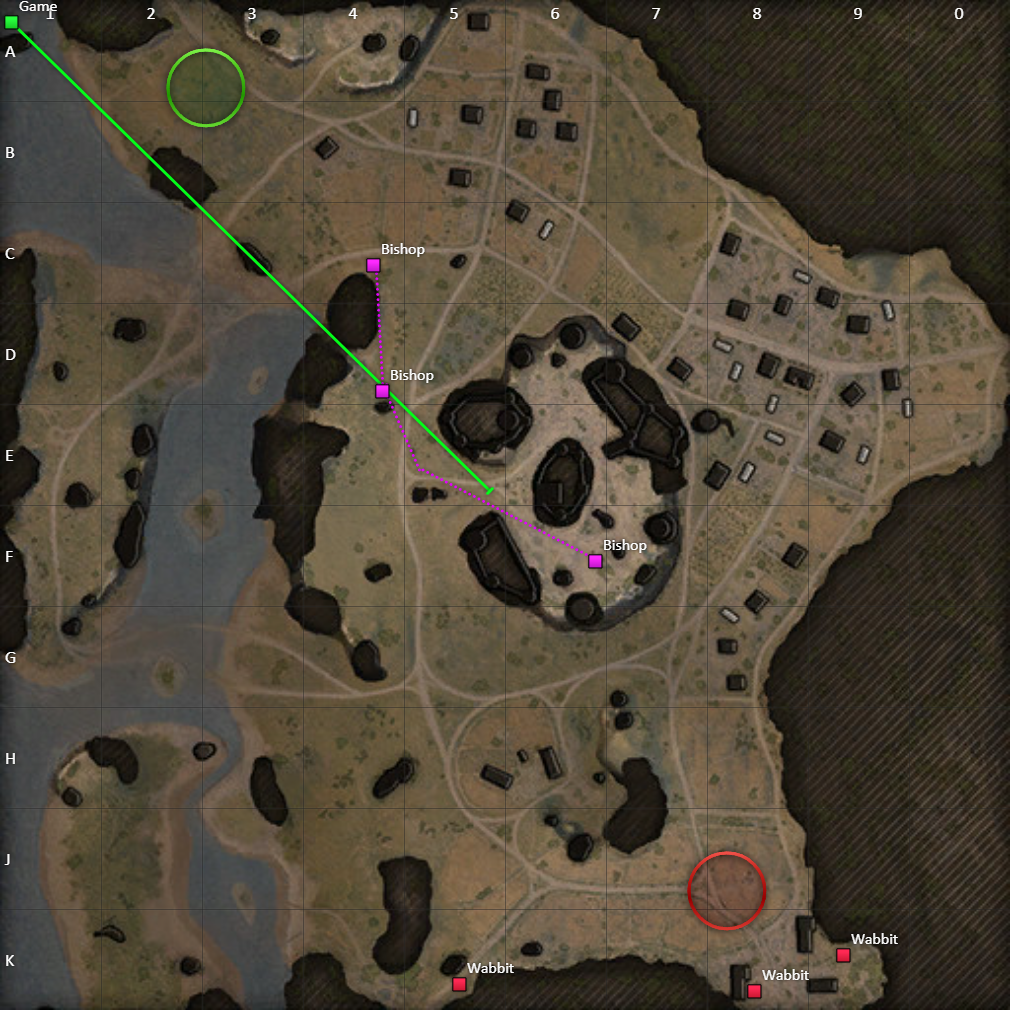
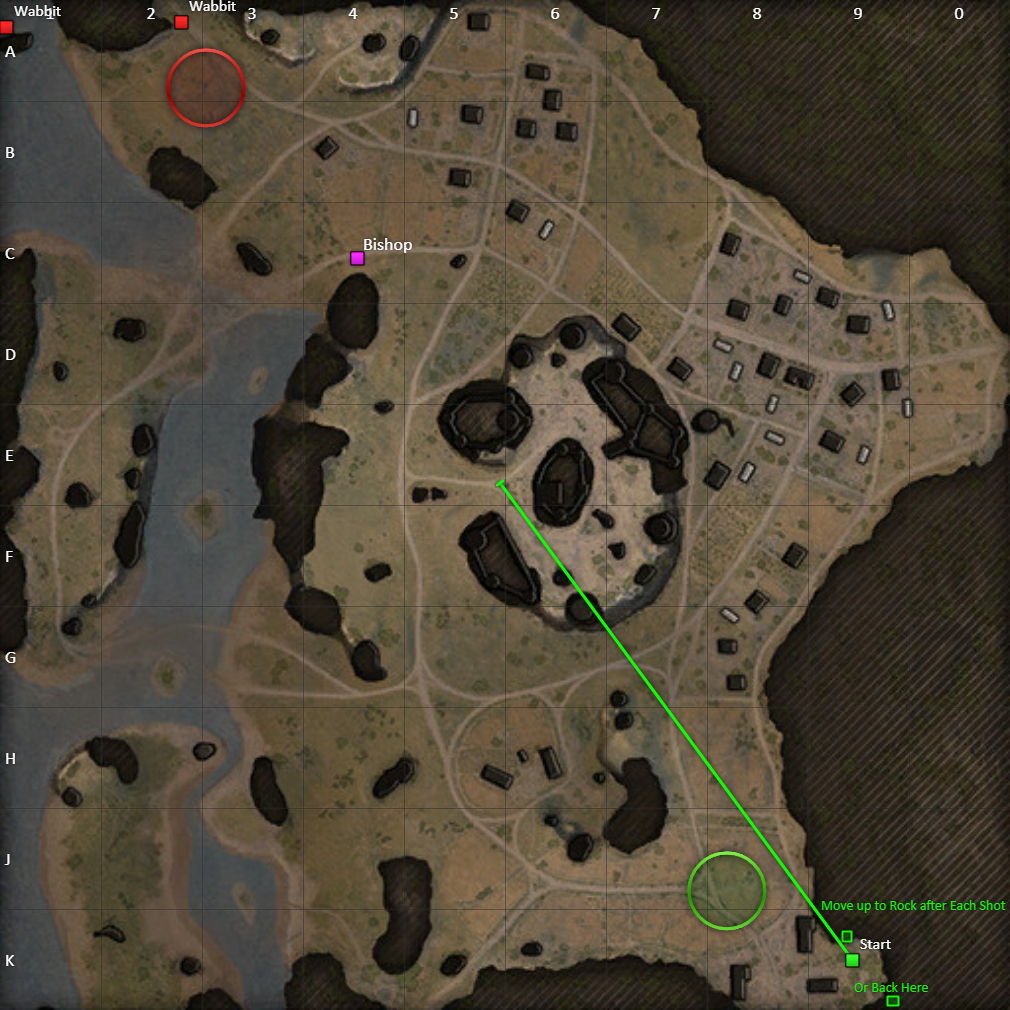
| Ghost Town North | Ghost Town South | |||||||
 |
|
 |
||||||
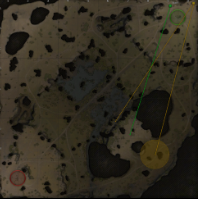
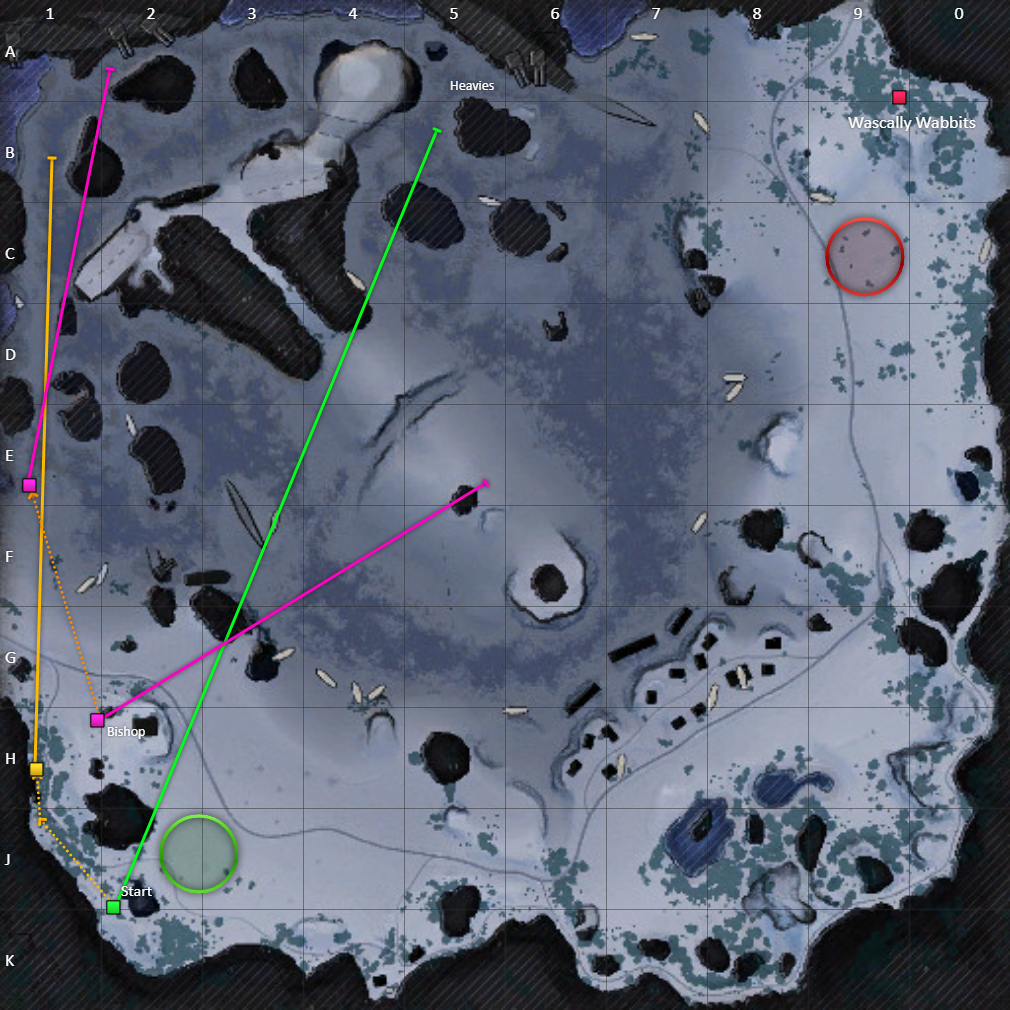
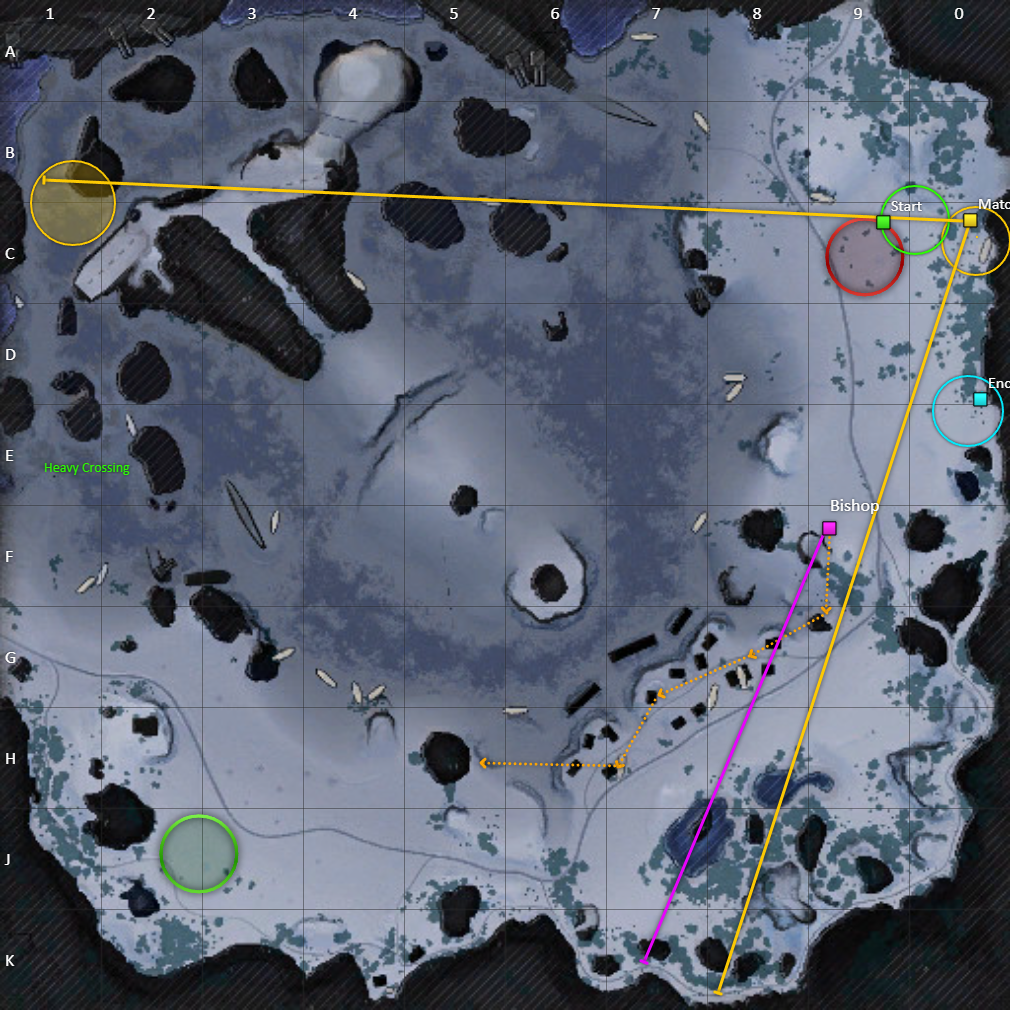
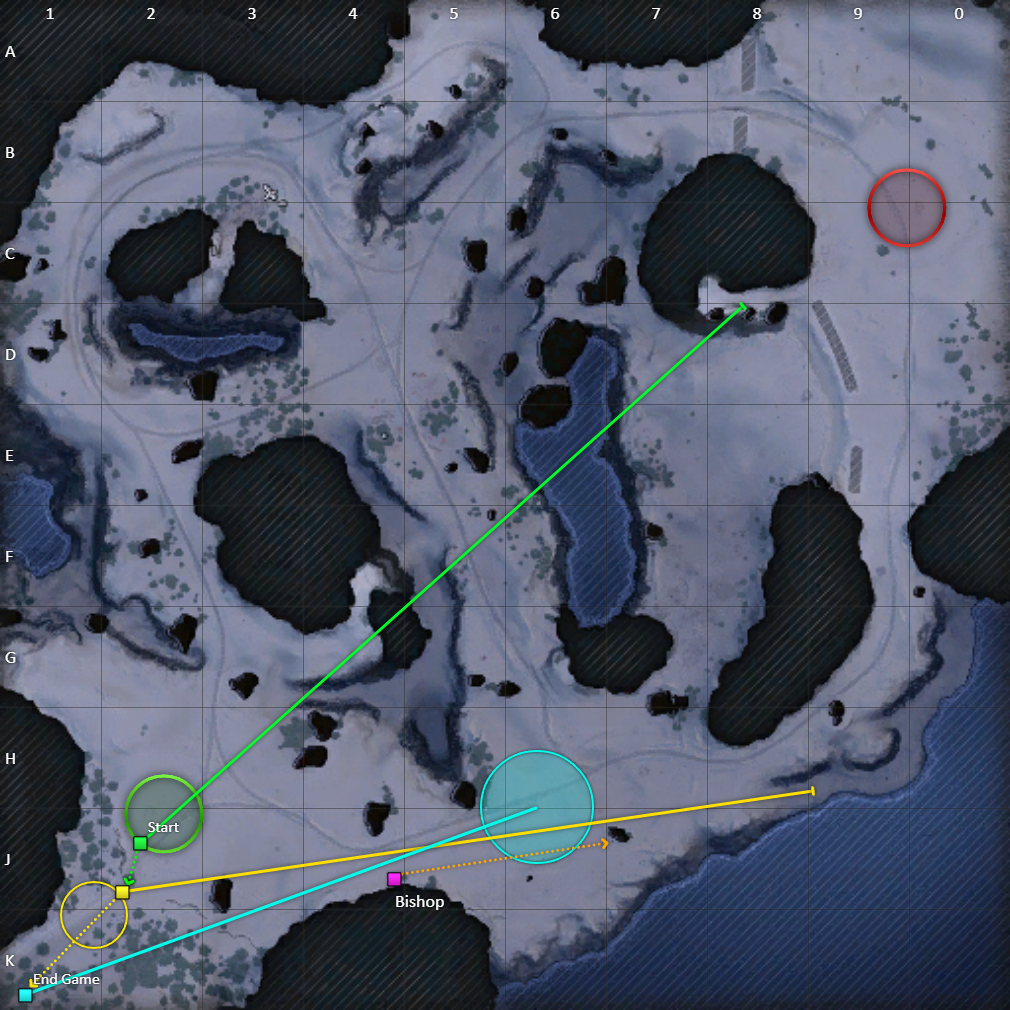
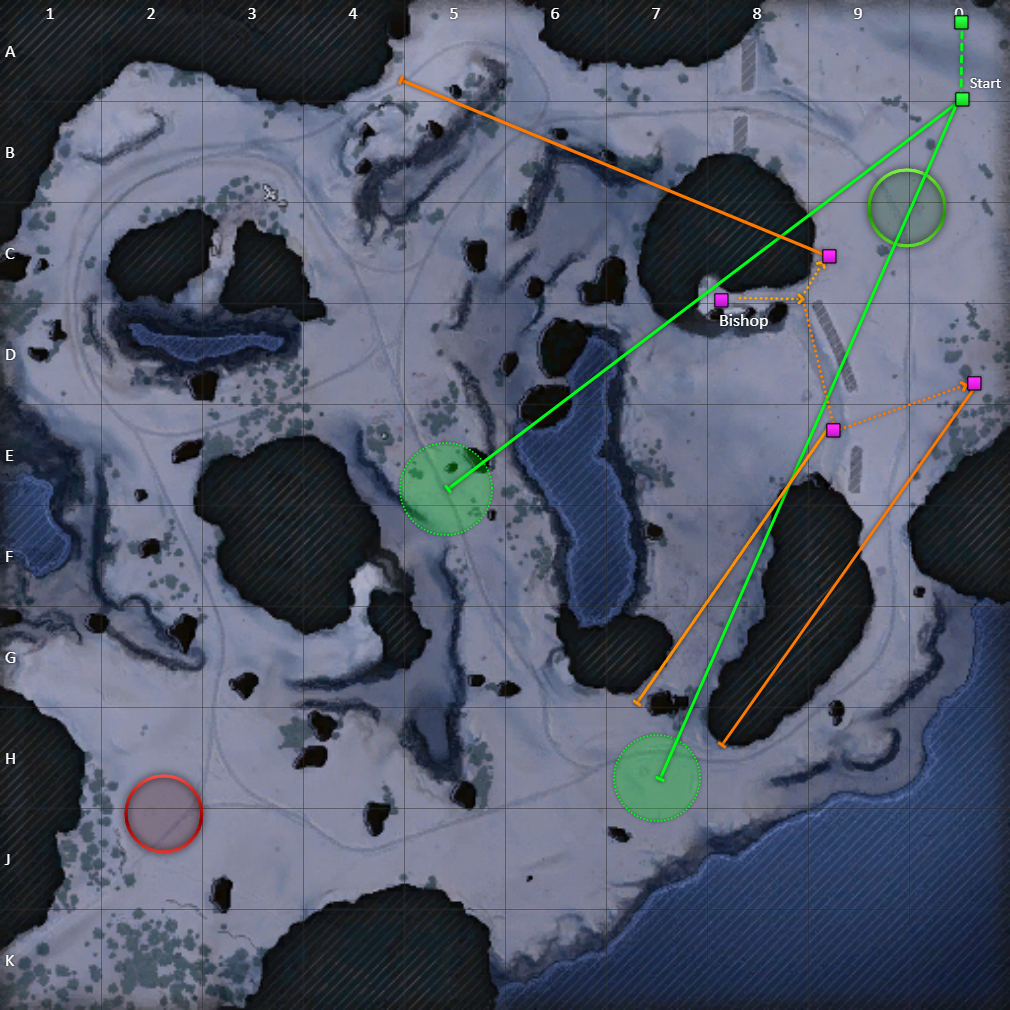
| Glacier West | Glacier East | |||||||
 |
|
 |
||||||
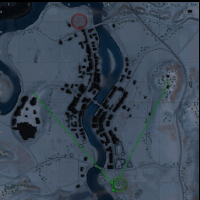
| Highway South West | Highway North East | |||||||
 |
|
 |
||||||
| Himmelsdorf South | Himmelsdorf North | |||||||
 |
|
 |
||||||
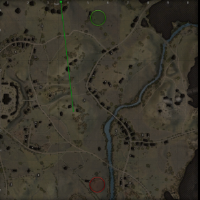
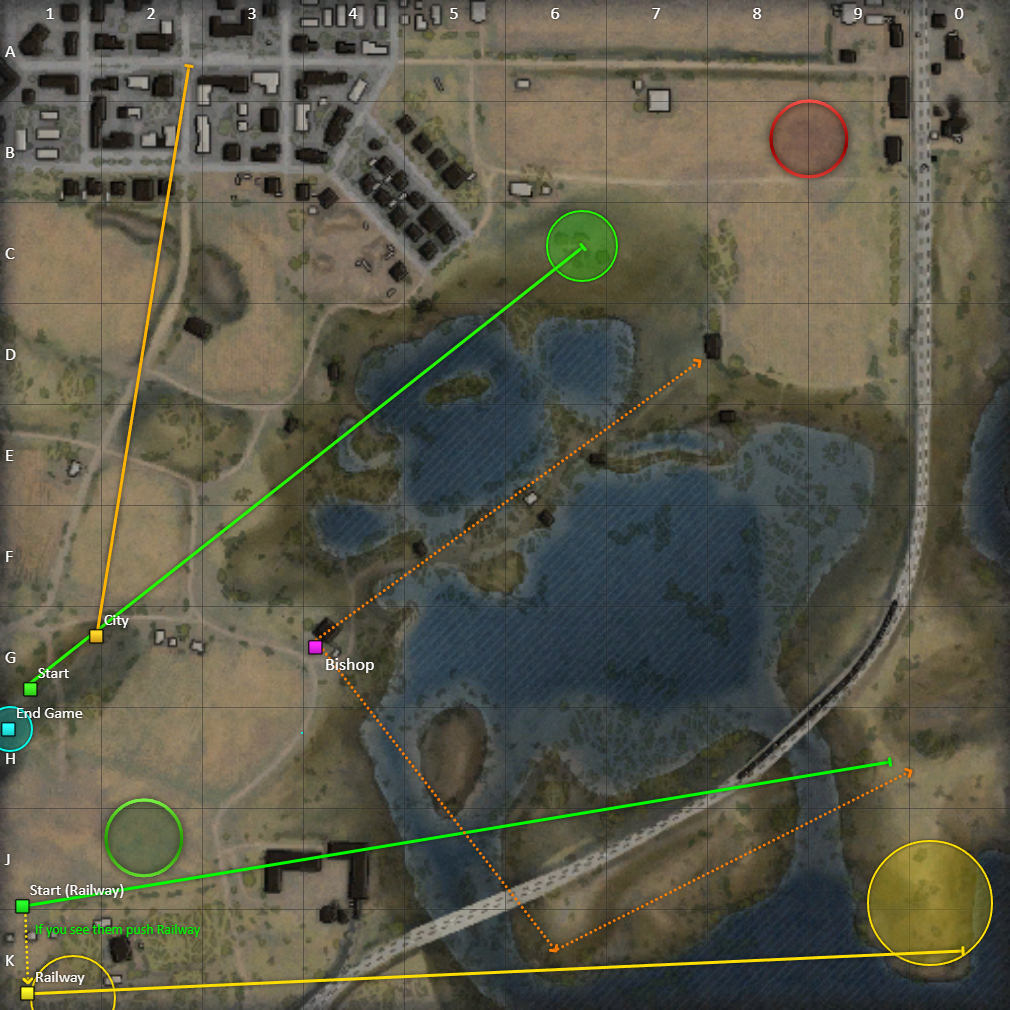
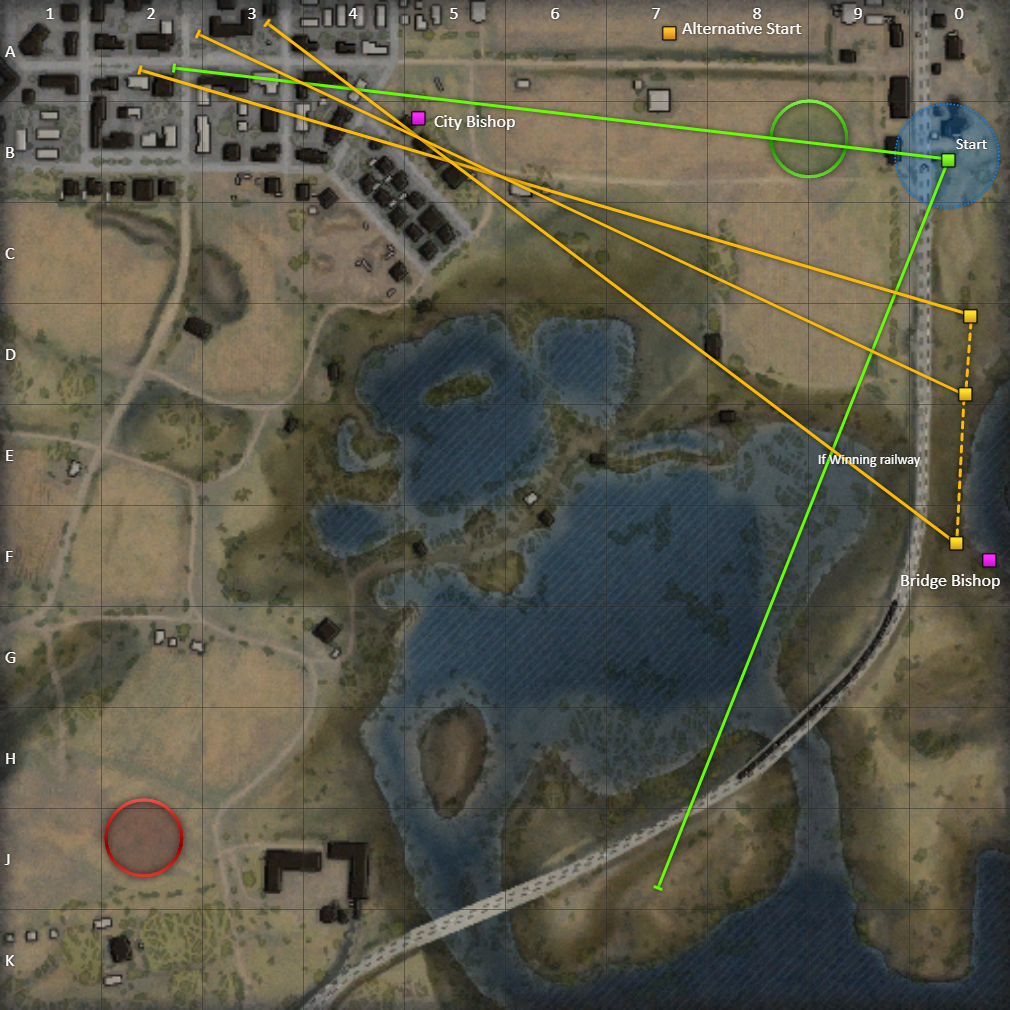
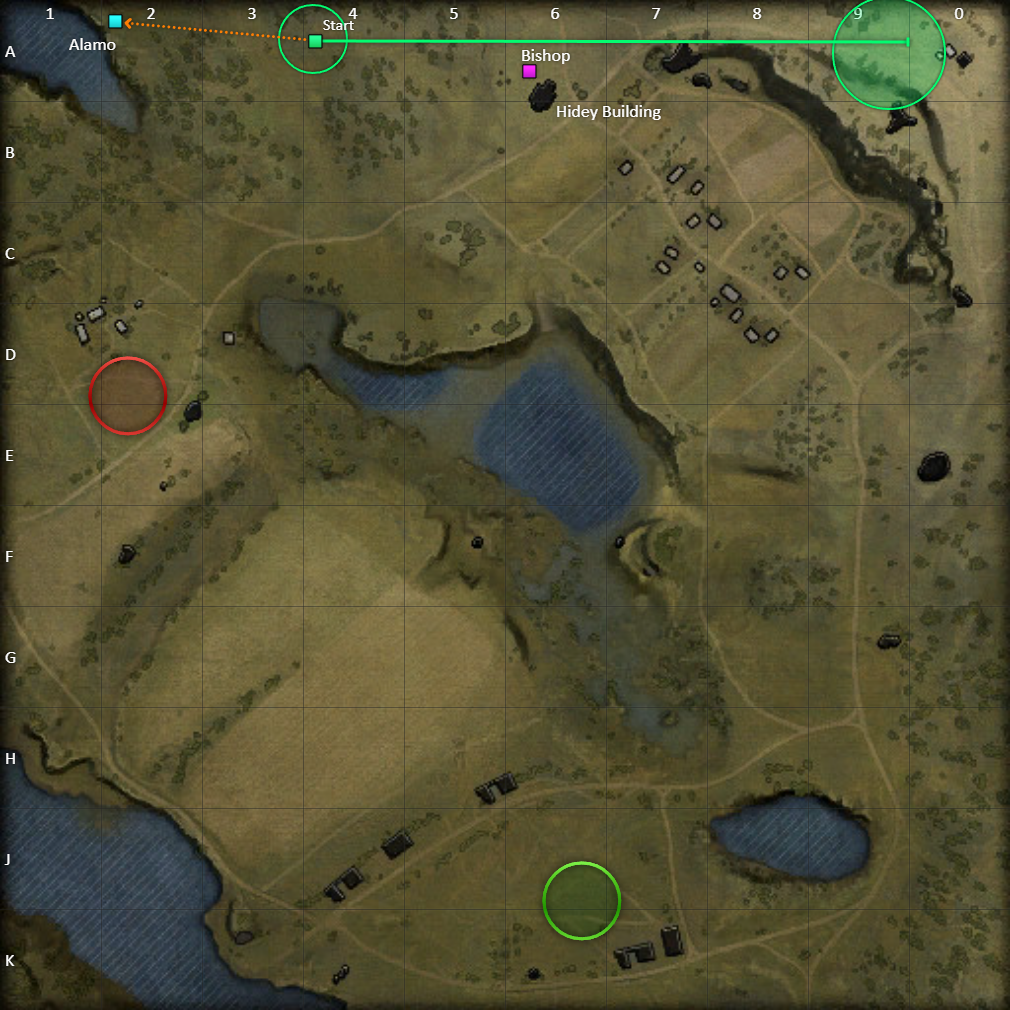
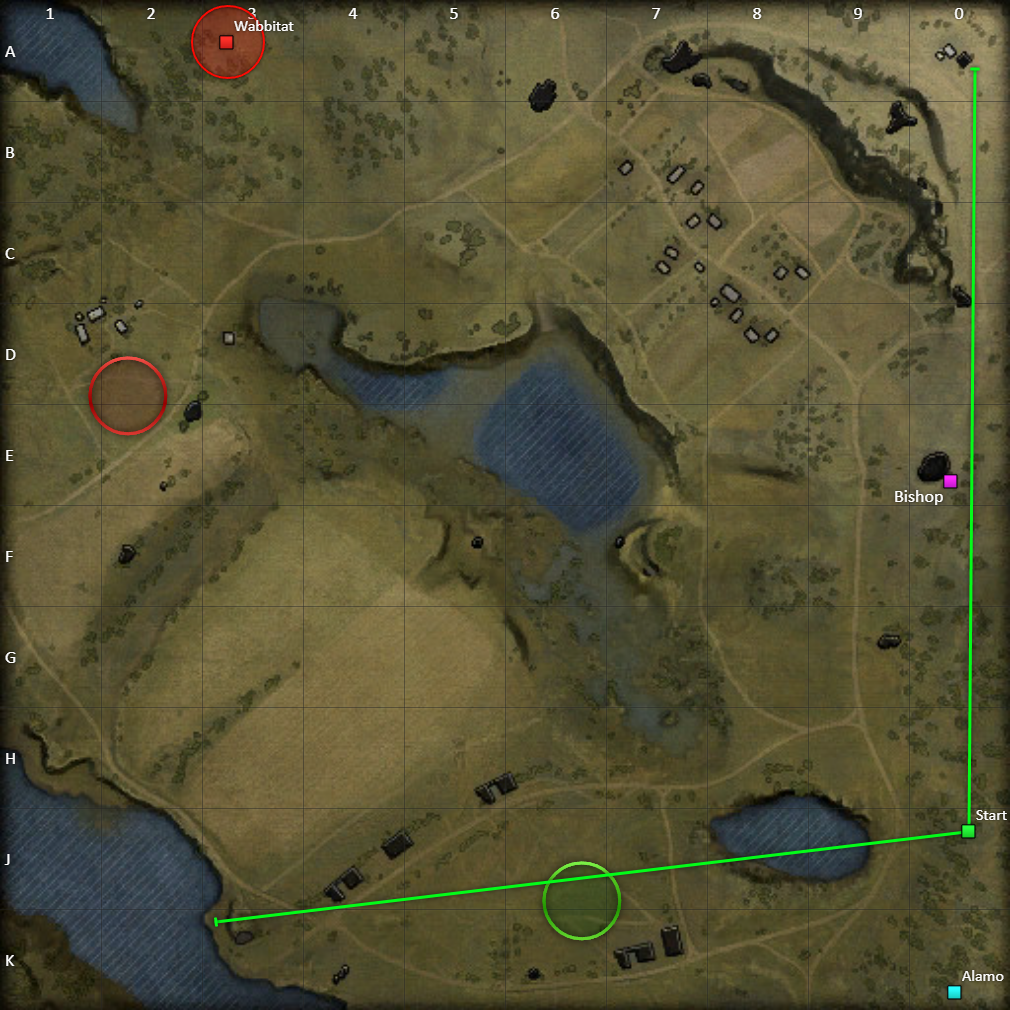
| Karelia South West | Karelia North East | |||||||
 |
|
 |
||||||
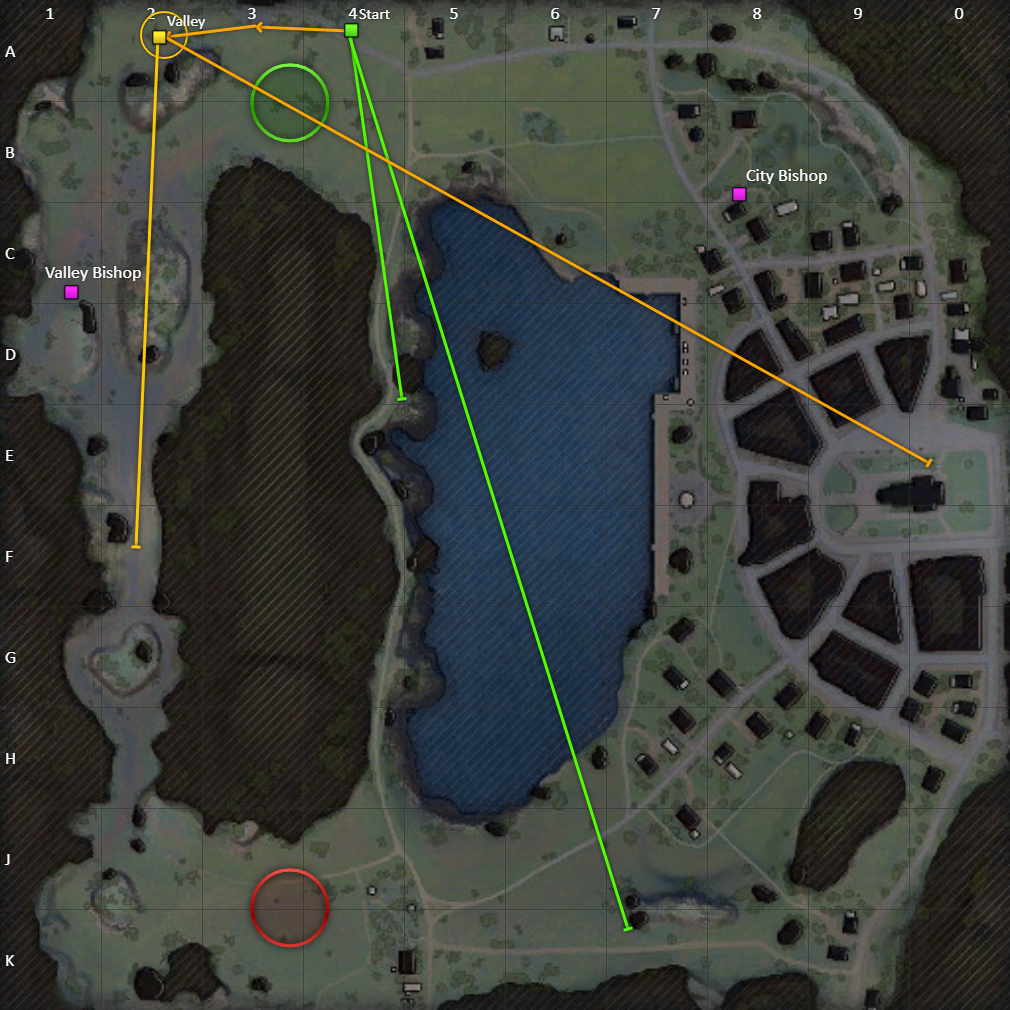
| Lakeville South West | Lakeville North East | |||||||
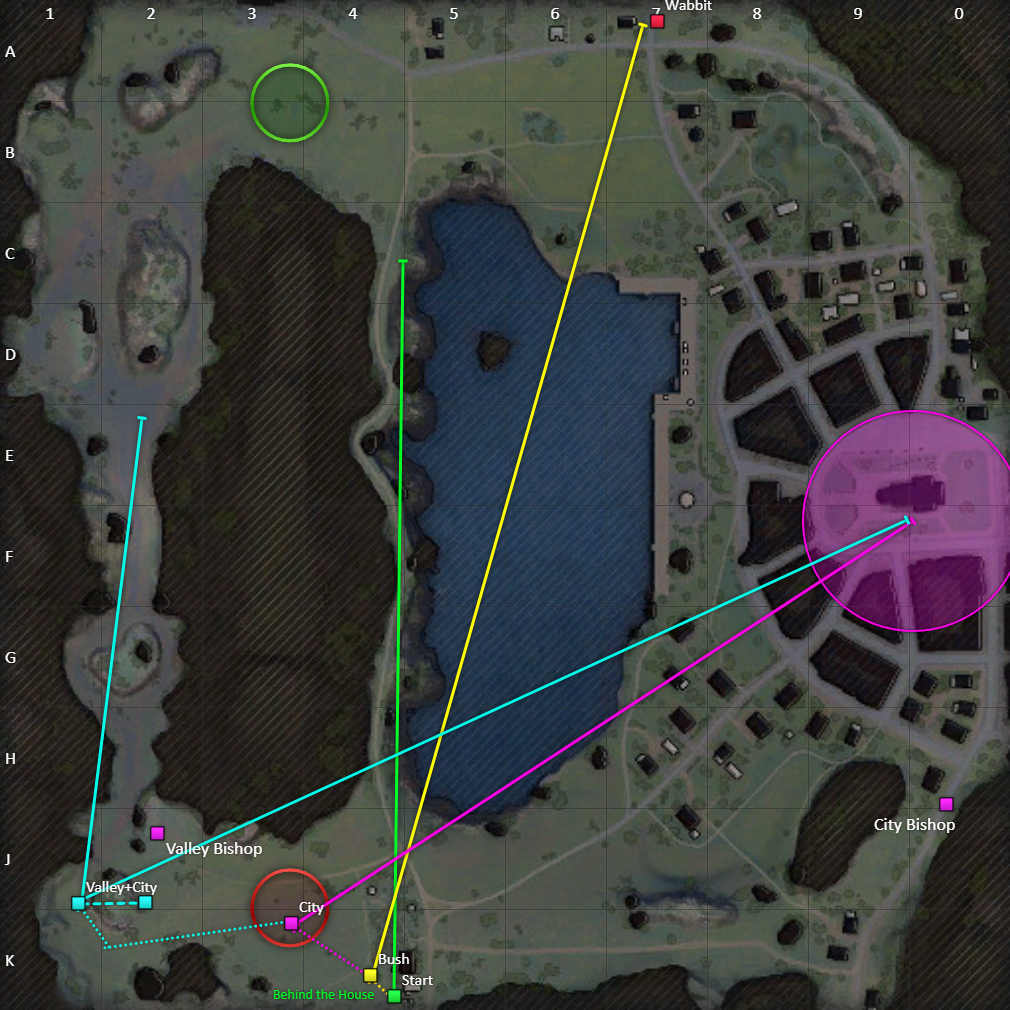 |
|
 |
||||||
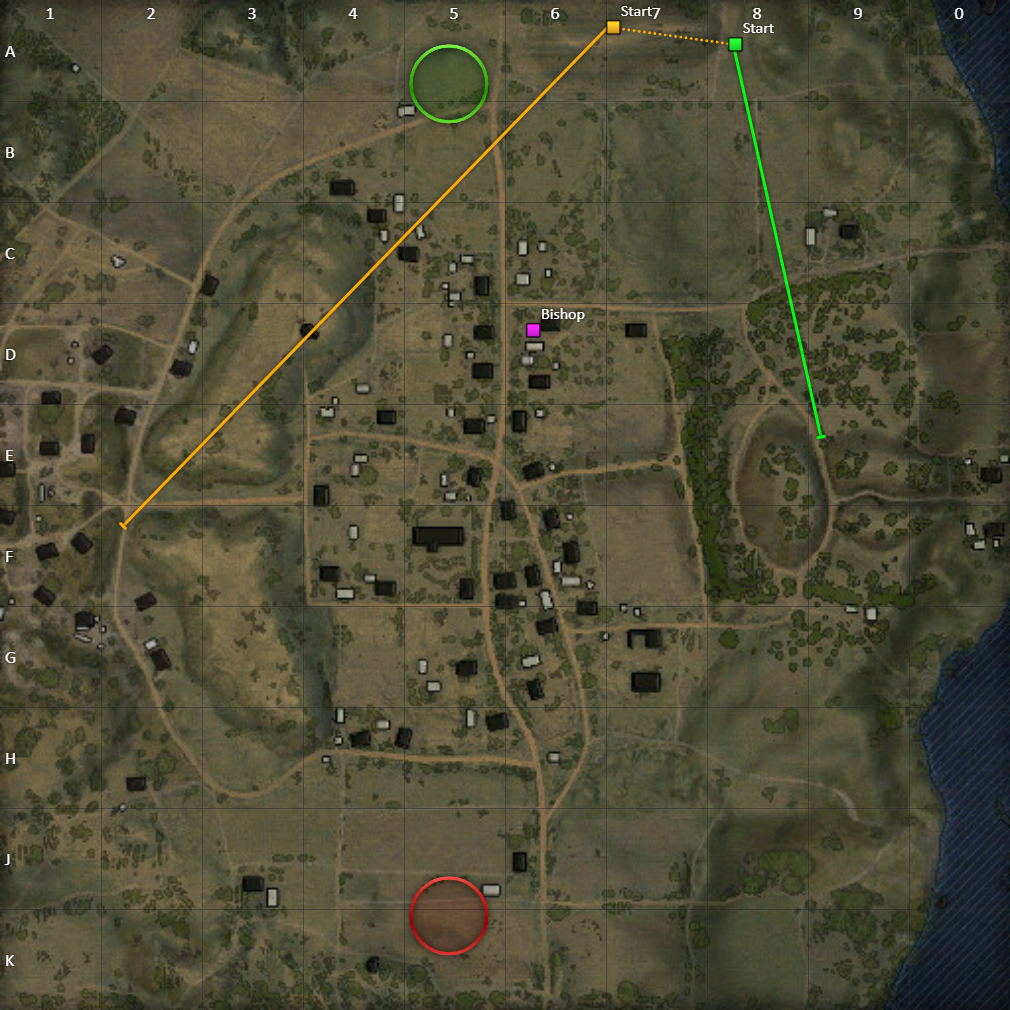
| Live Oaks South West | Live Oaks North East | |||||||
 |
|
 |
||||||
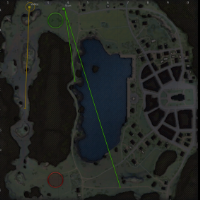
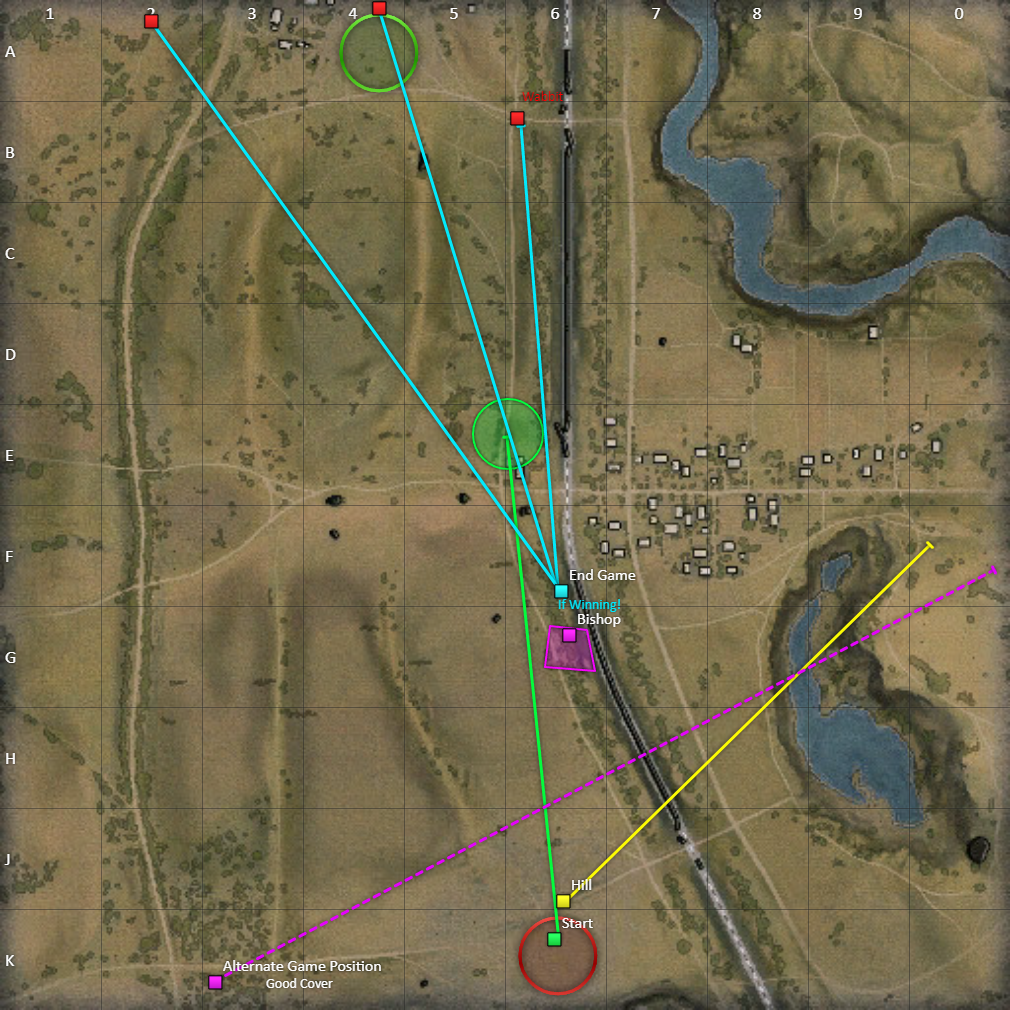
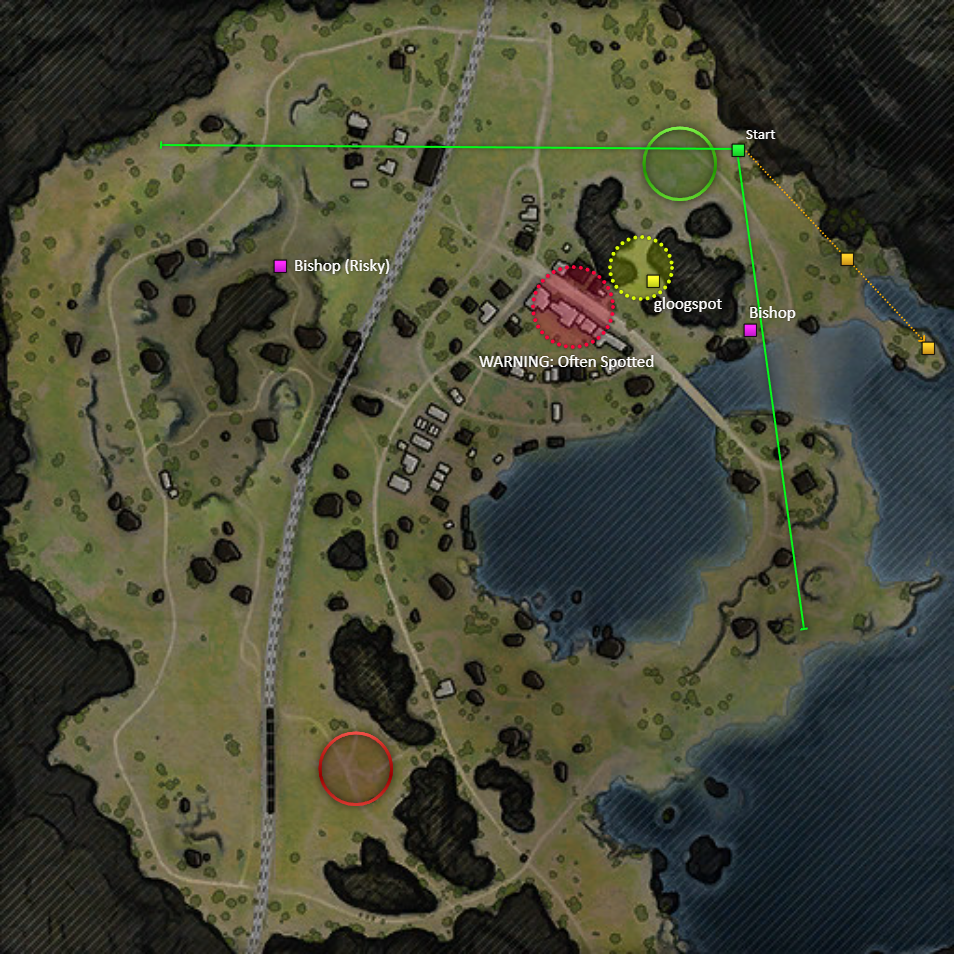
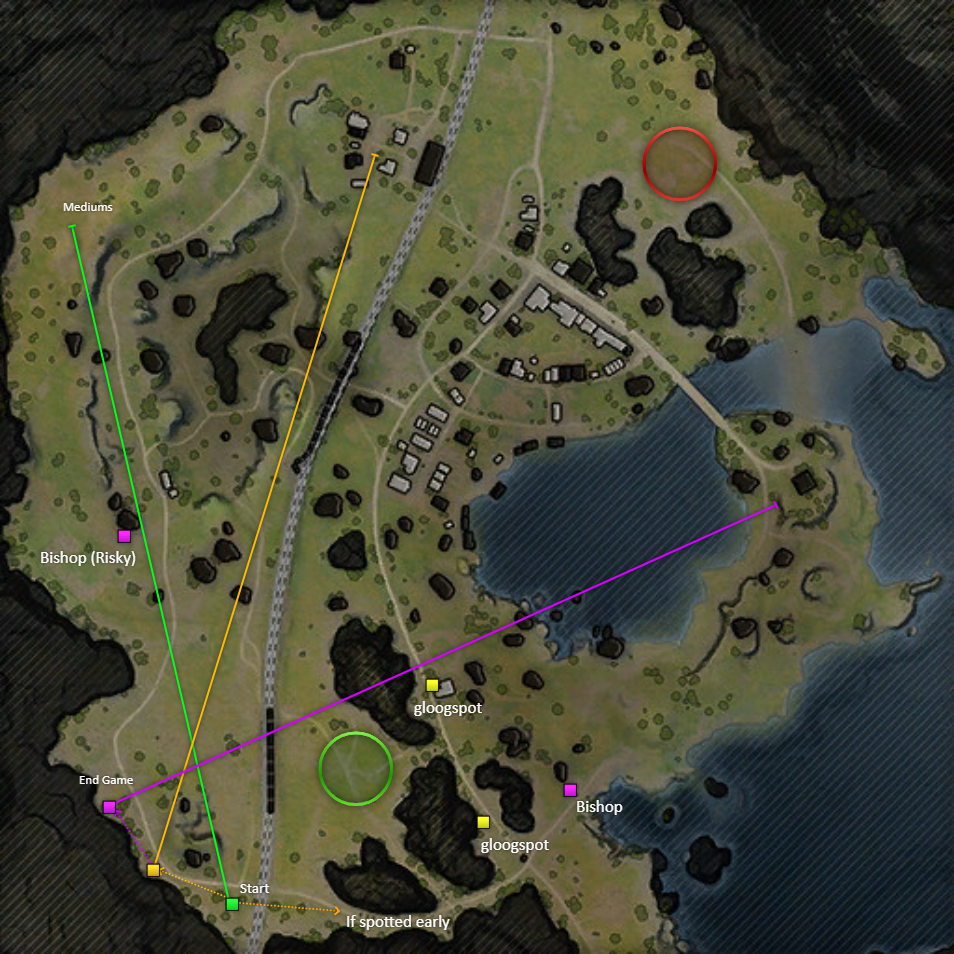
| Malinovka North West | Malinovka South East | |||||||
 |
|
 |
||||||
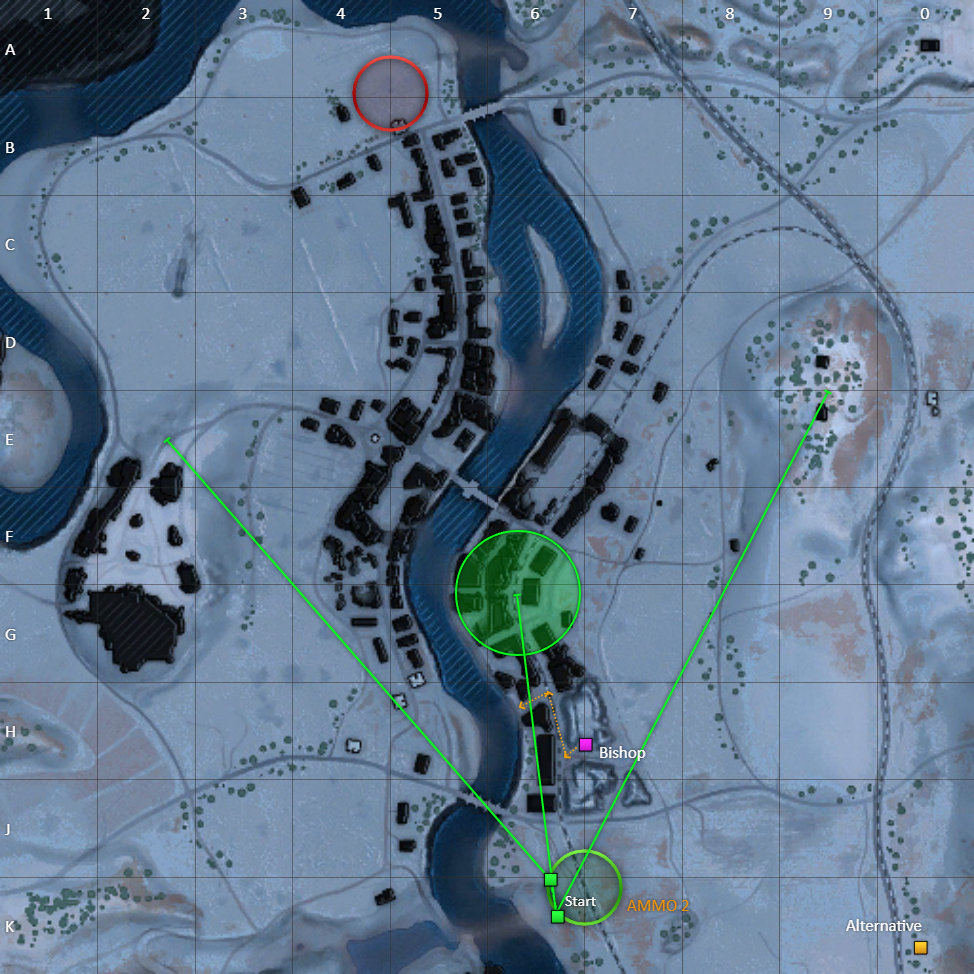
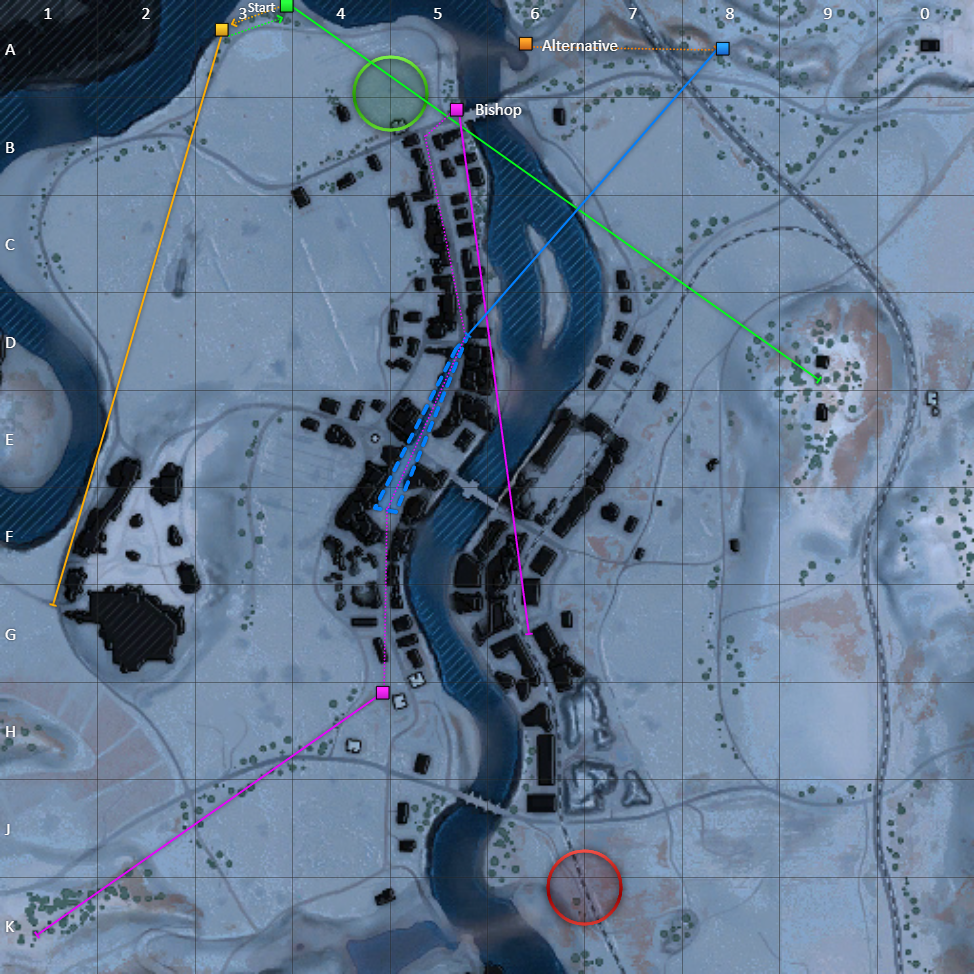
| Mannerheim Line South West | Mannerheim Line North East | |||||||
 |
|
 |
||||||
| Mines North West | Mines South East | |||||||
 |
|
 |
||||||
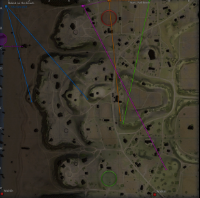
| Mountain Pass North West | Mountain Pass South East | |||||||
 |
|
 |
||||||
| Murovanka North | Murovanka South | |||||||
 |
|
 |
||||||
| Overlord North | Overlord South | |||||||
 |
|
 |
||||||
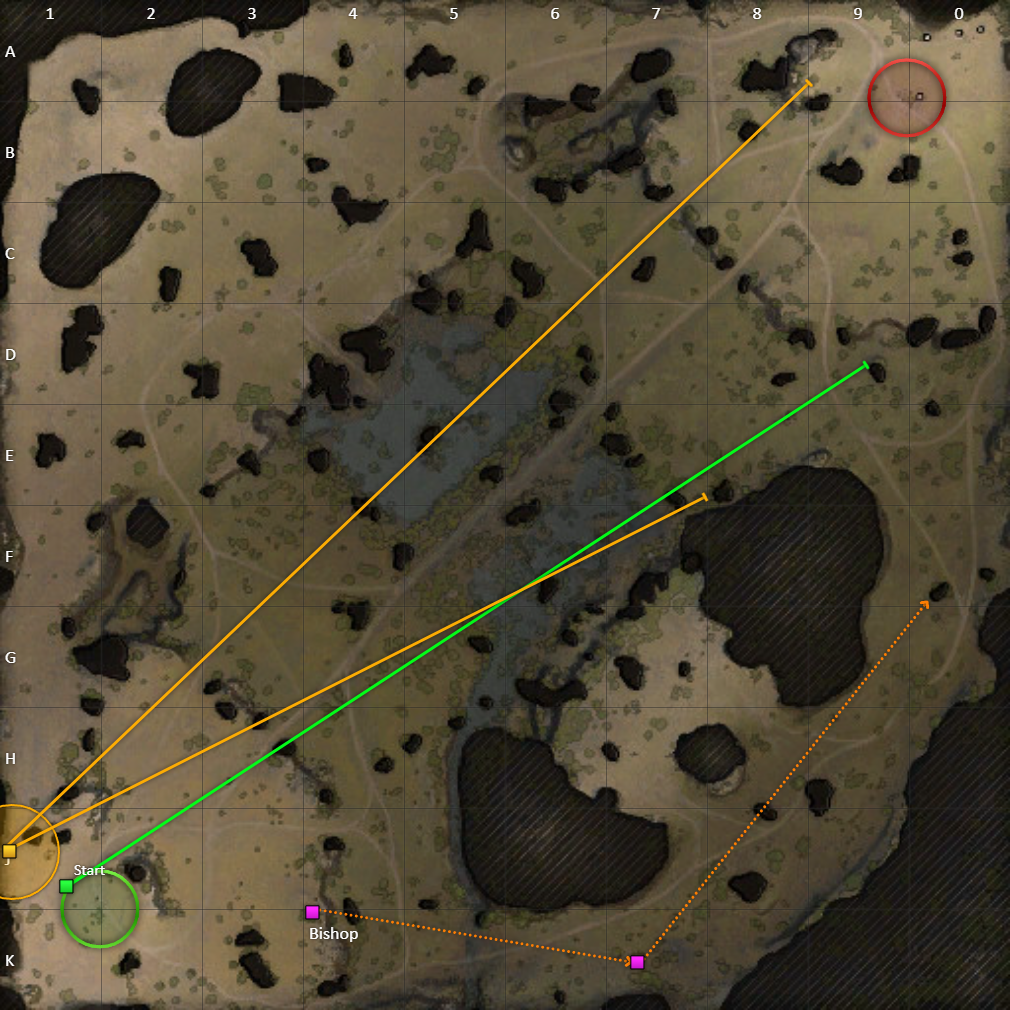
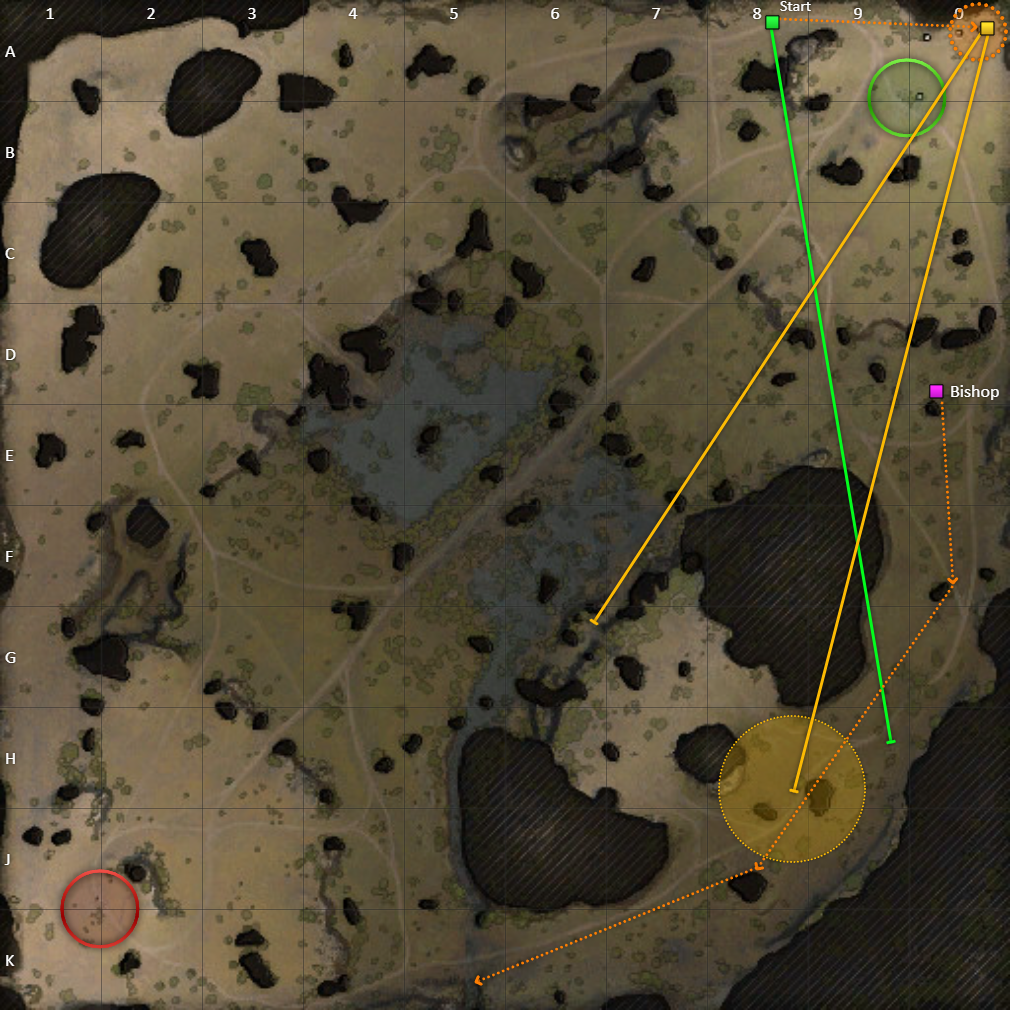
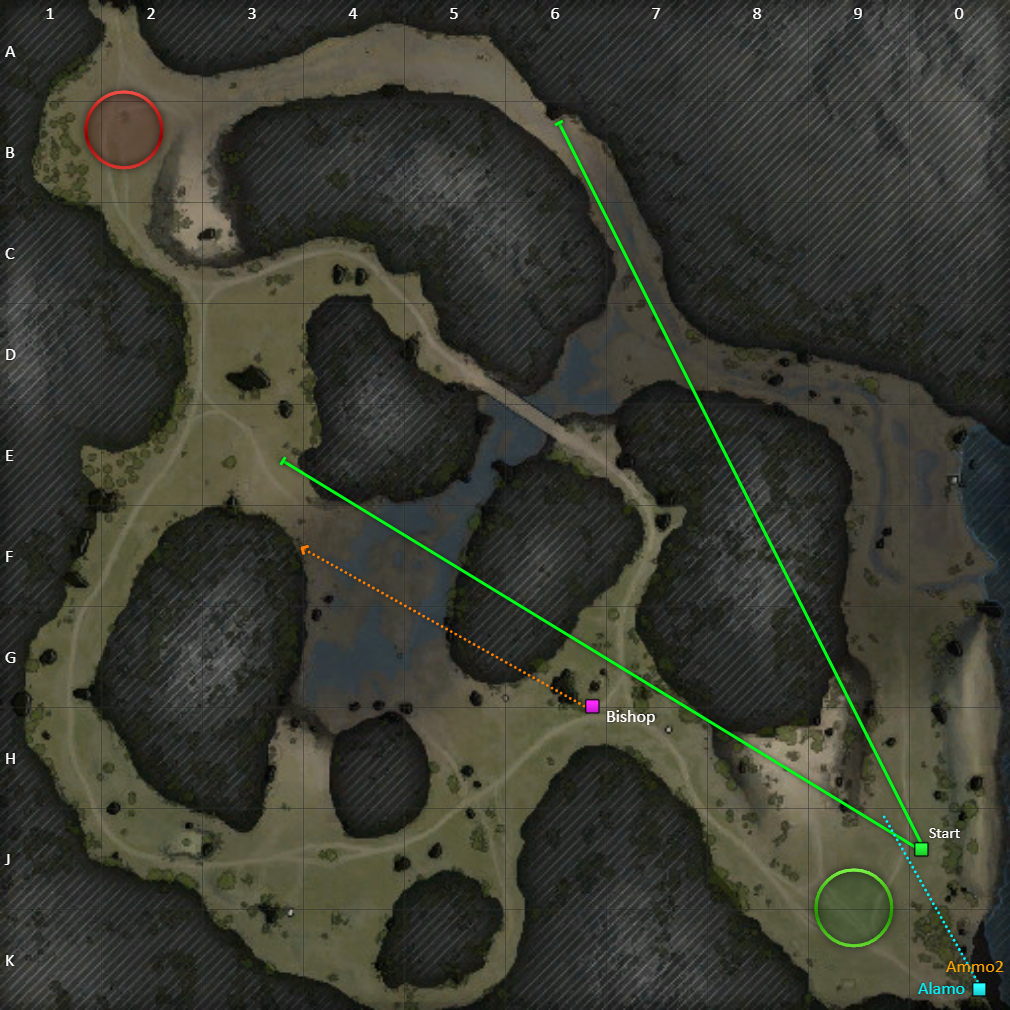
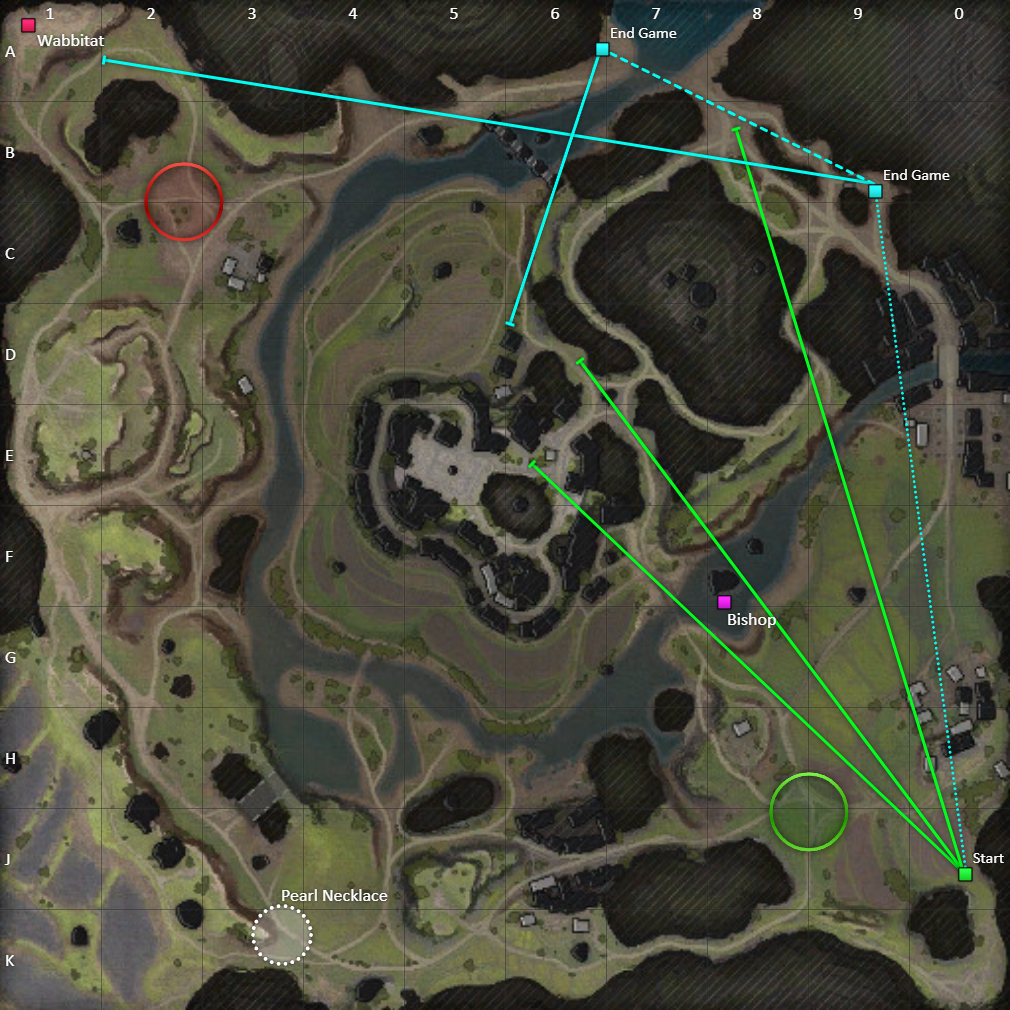
| Pearl River North East | Pearl River South West | |||||||
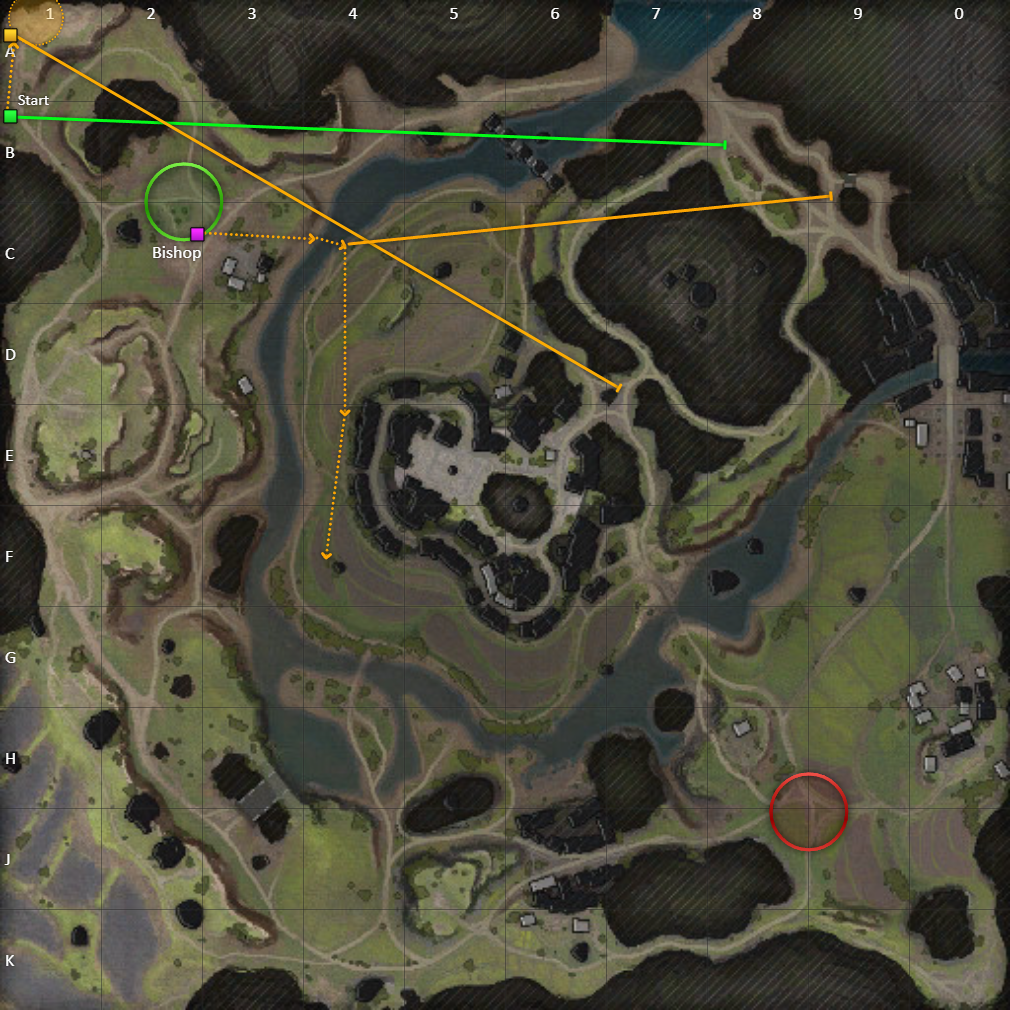 |
|
 |
||||||
| Pilsen North | Pilsen South | |||||||
 |
|
 |
||||||
| Prohorovka North | Prohorovka South | |||||||
 |
|
 |
||||||
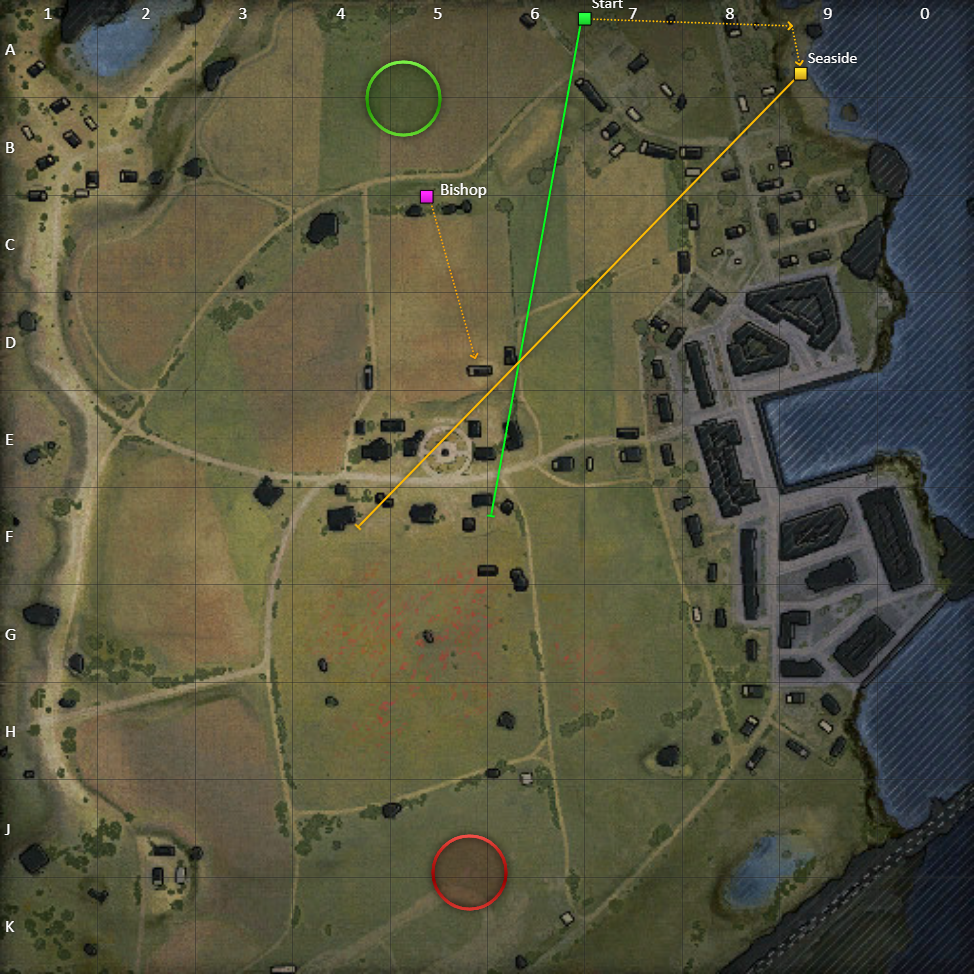
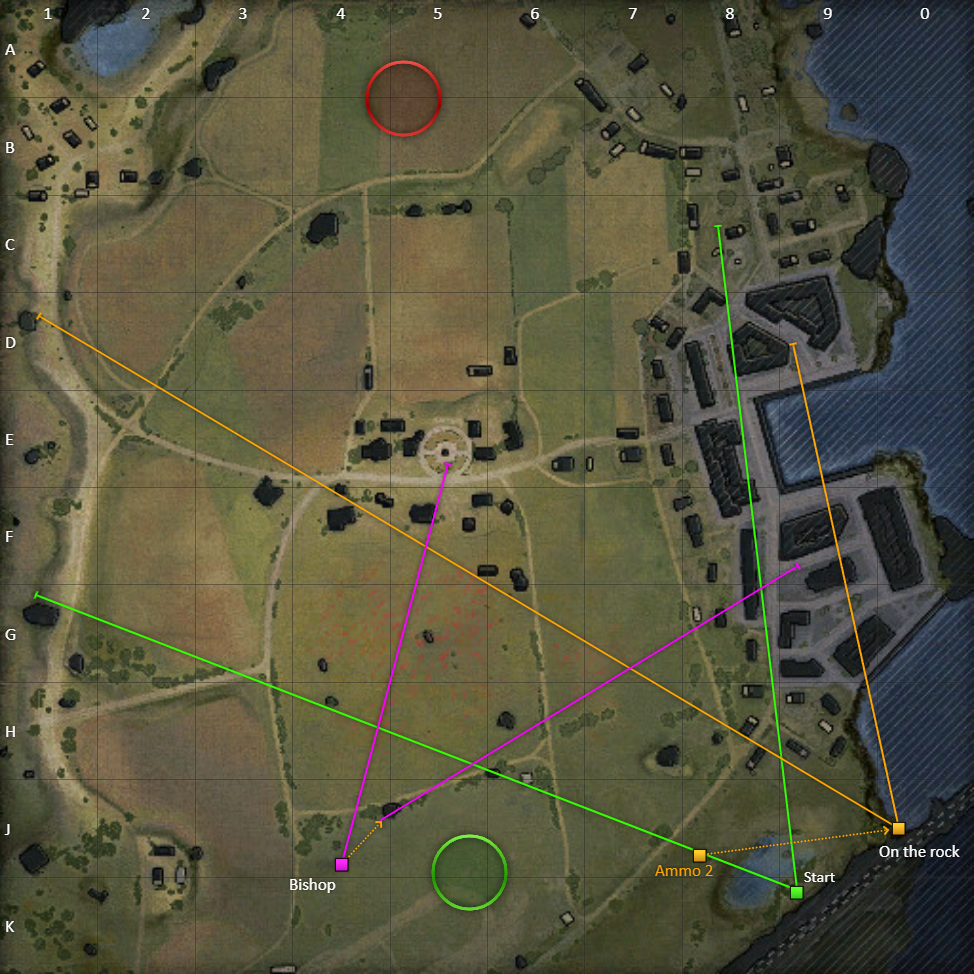
| Province North | Province South | |||||||
 |
|
 |
||||||
| Redshire North | Redshire South | |||||||
 |
|
 |
||||||
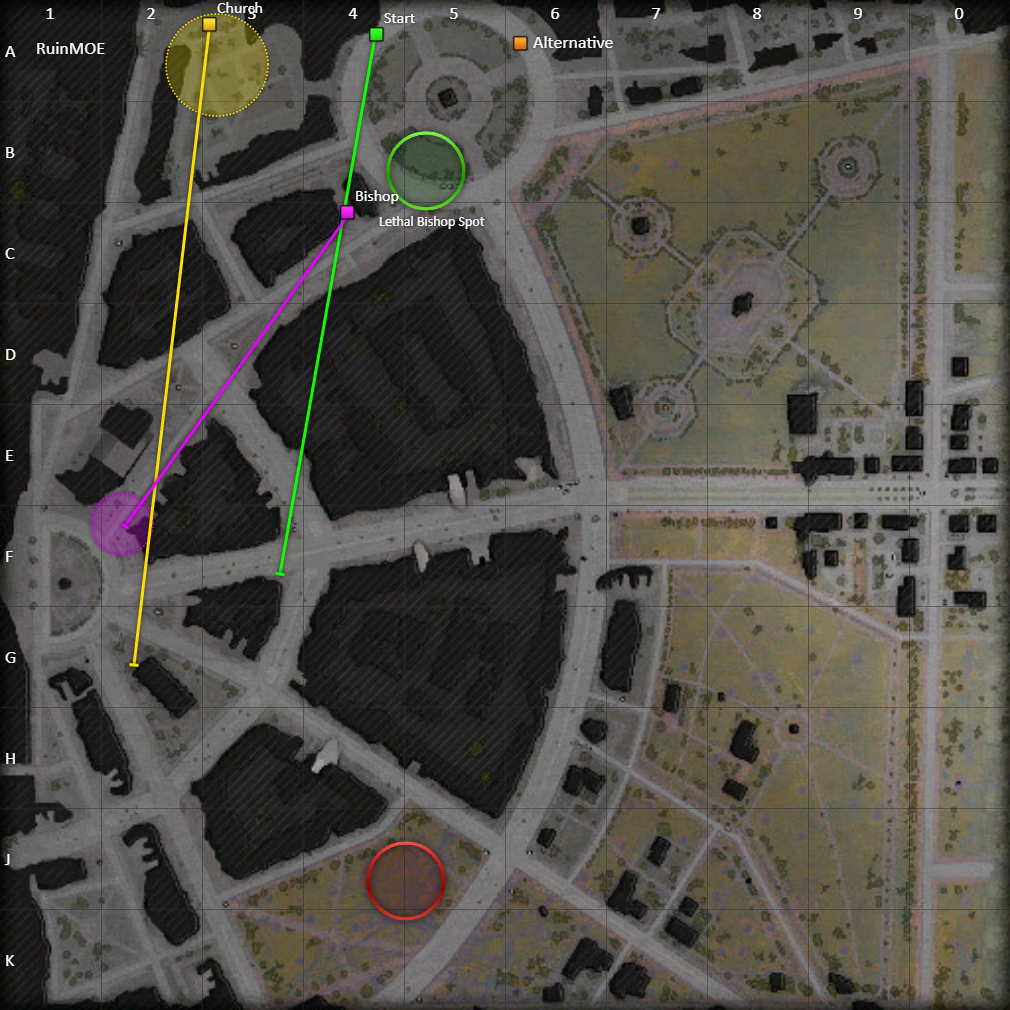
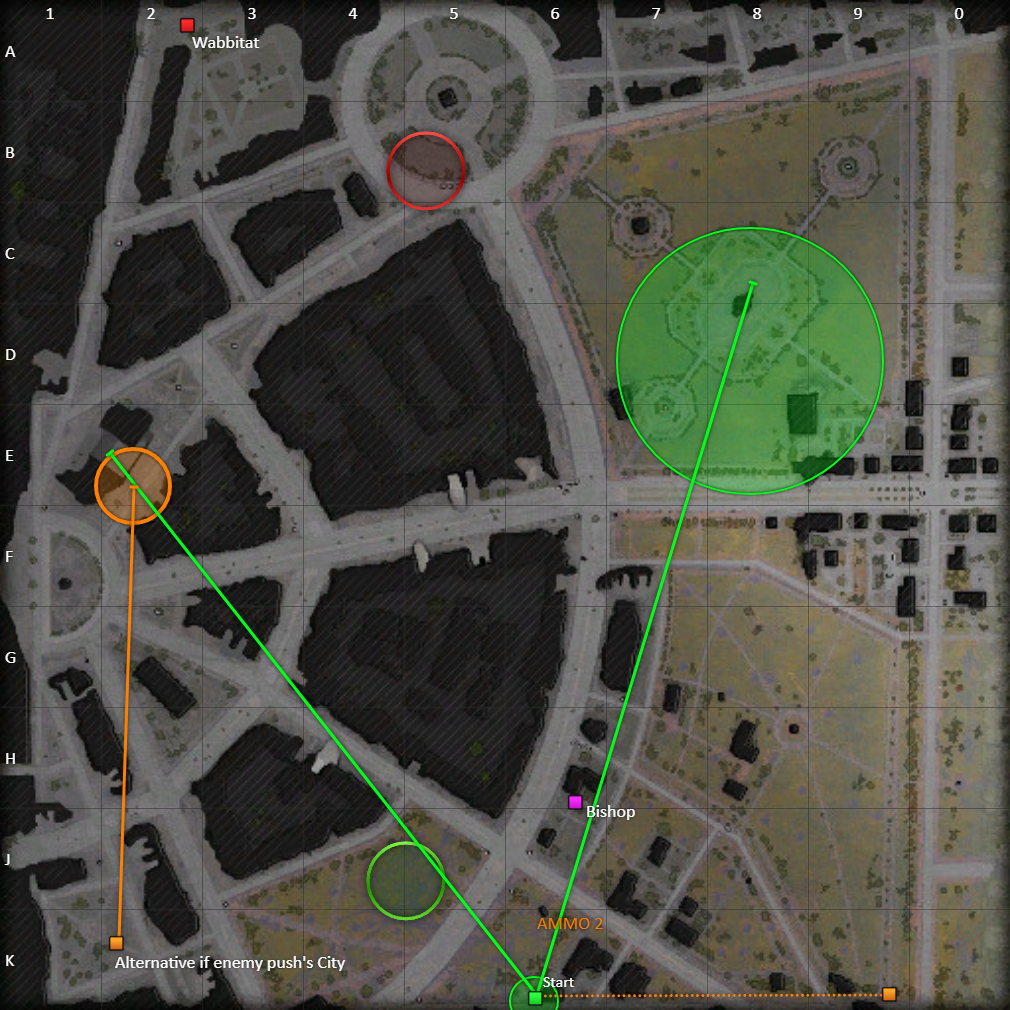
| Ruinberg North | Ruinberg South | |||||||
 |
|
 |
||||||
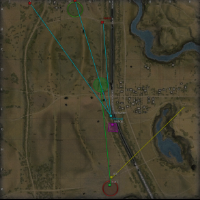
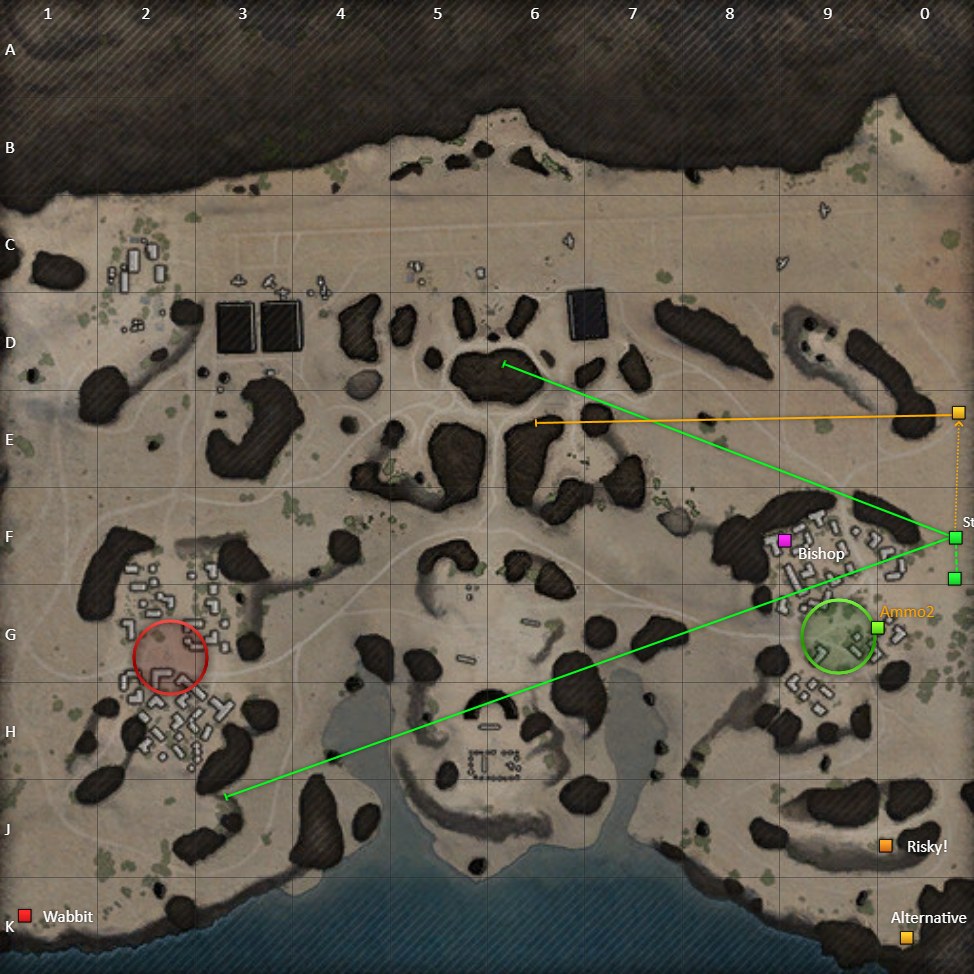
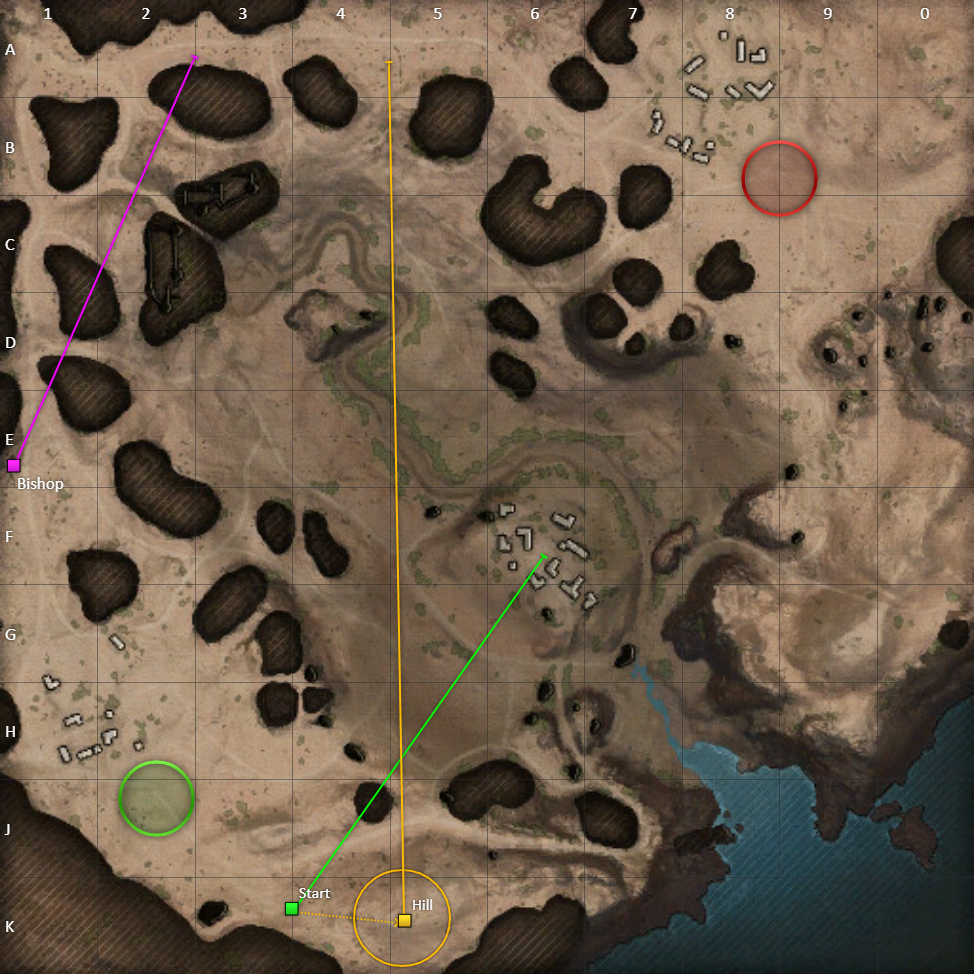
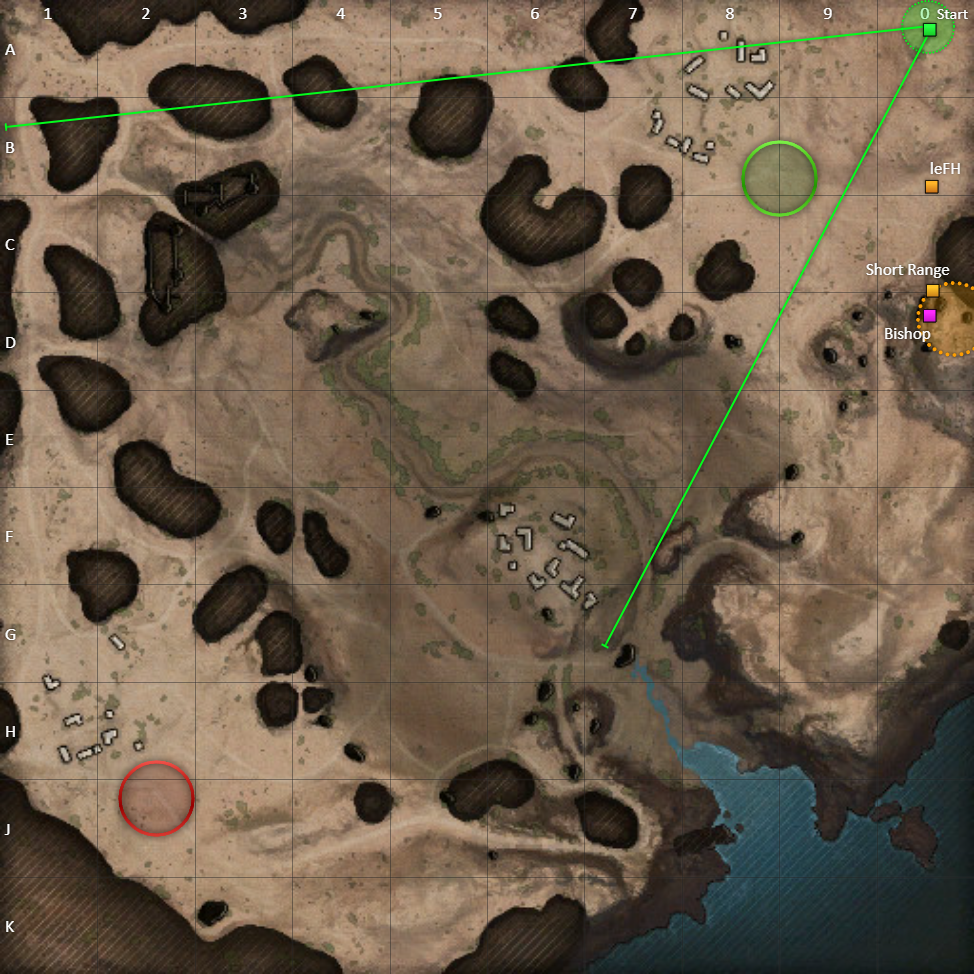
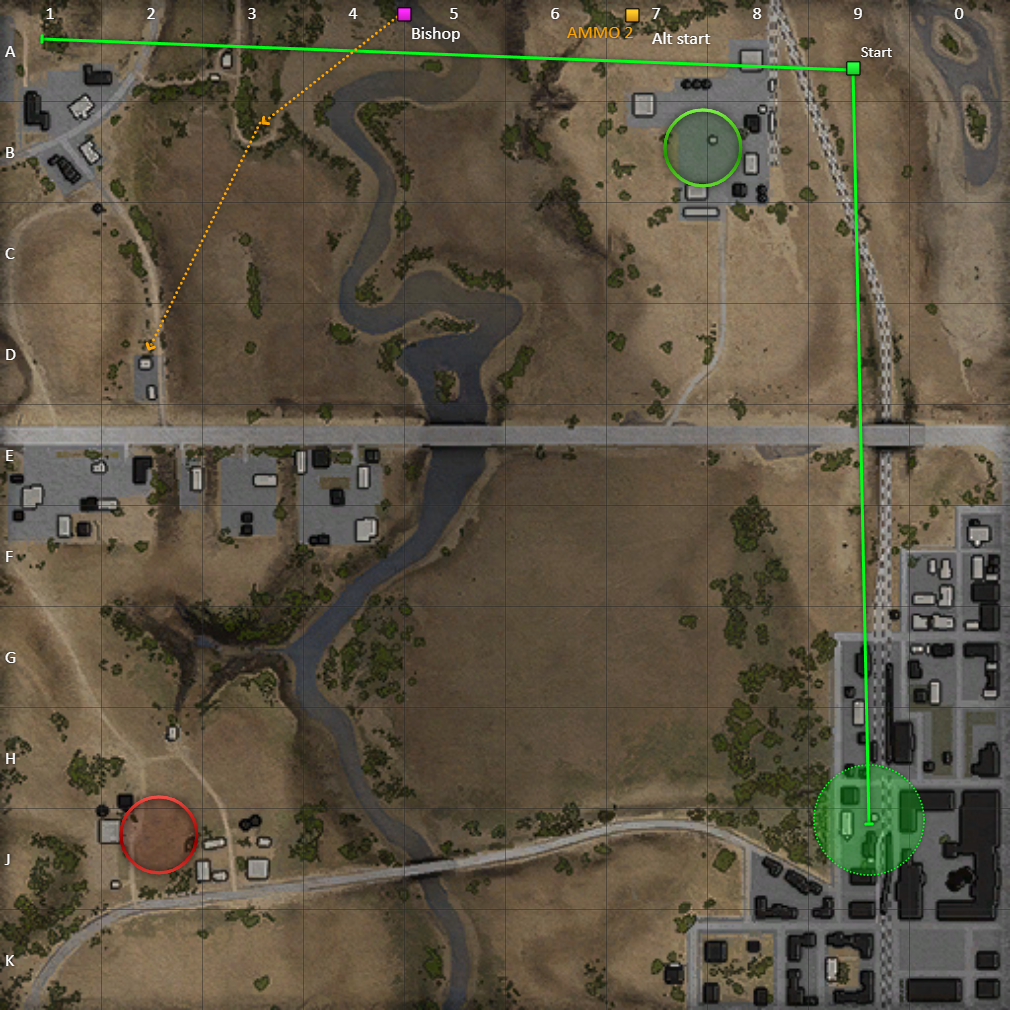
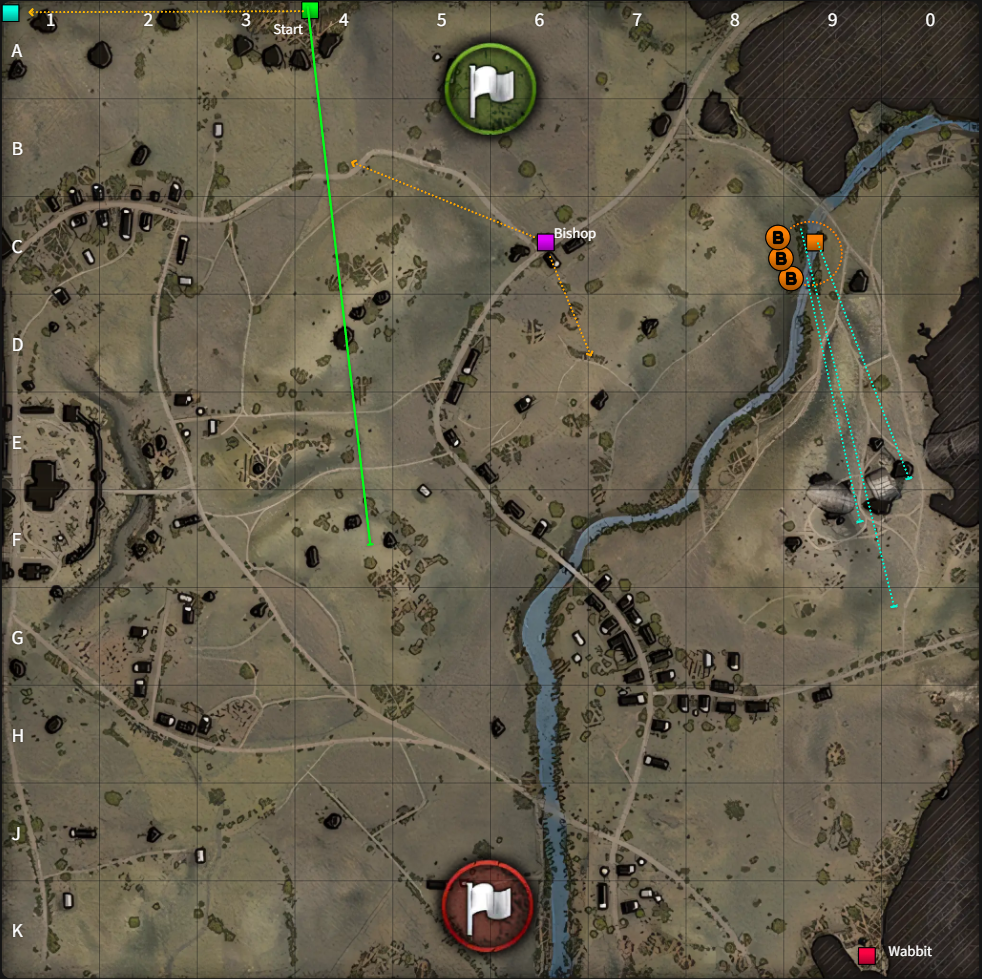
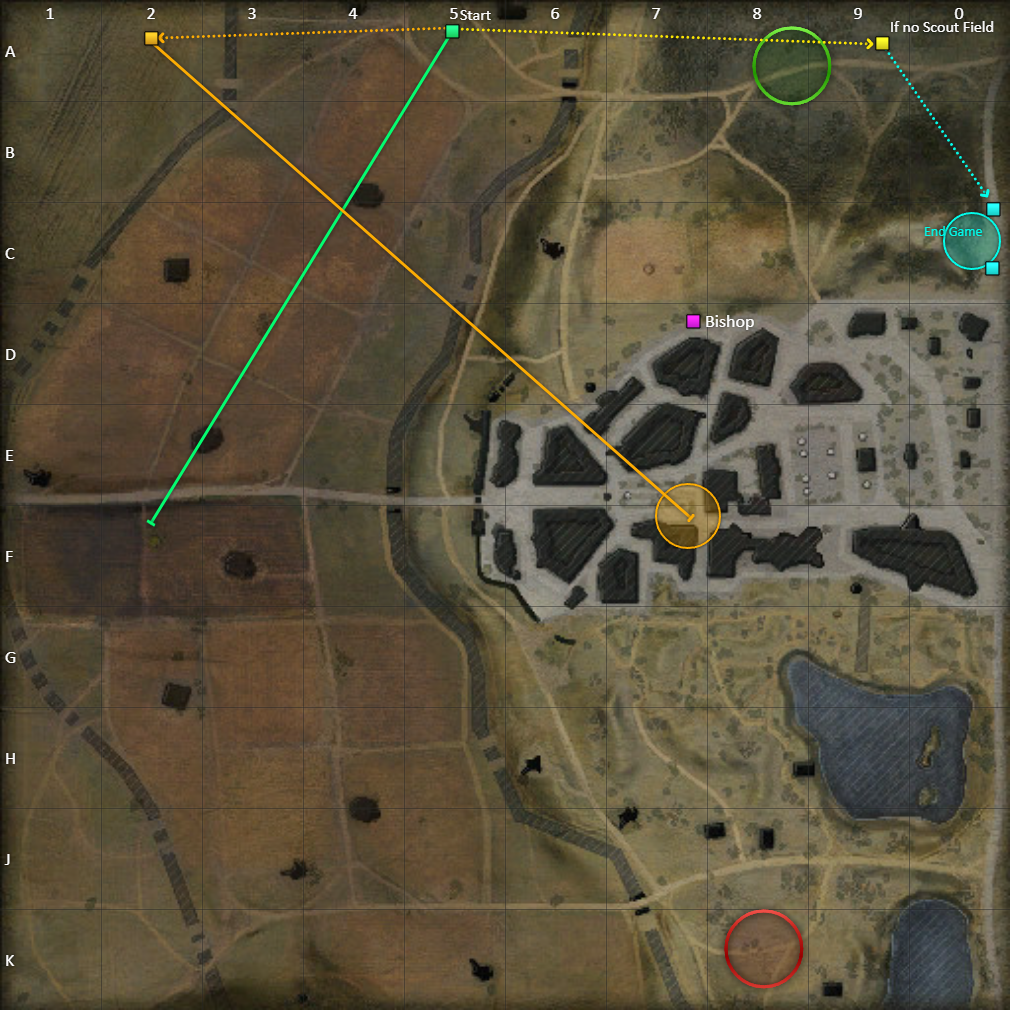
| Sand River West | Sand River East | |||||||
 |
|
 |
||||||
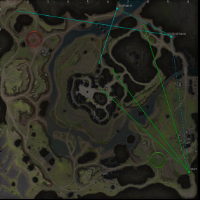
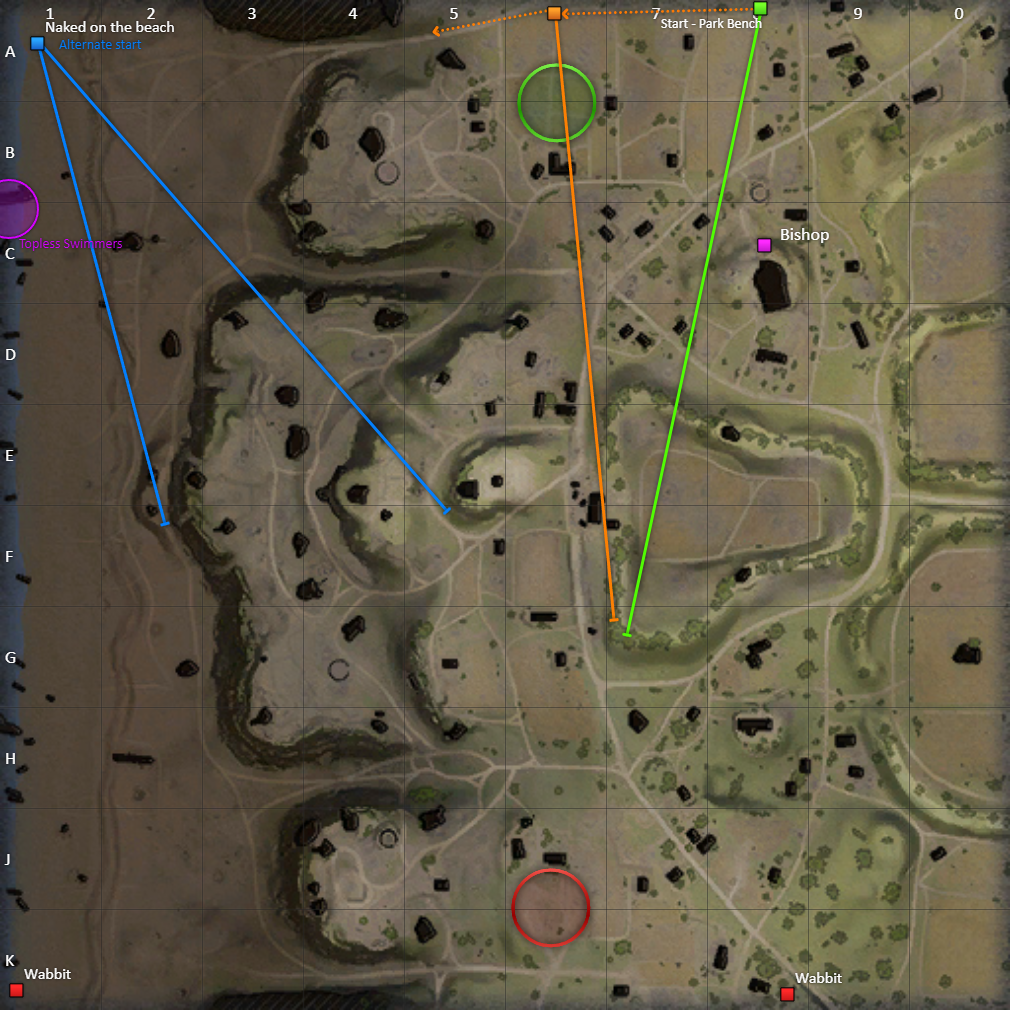
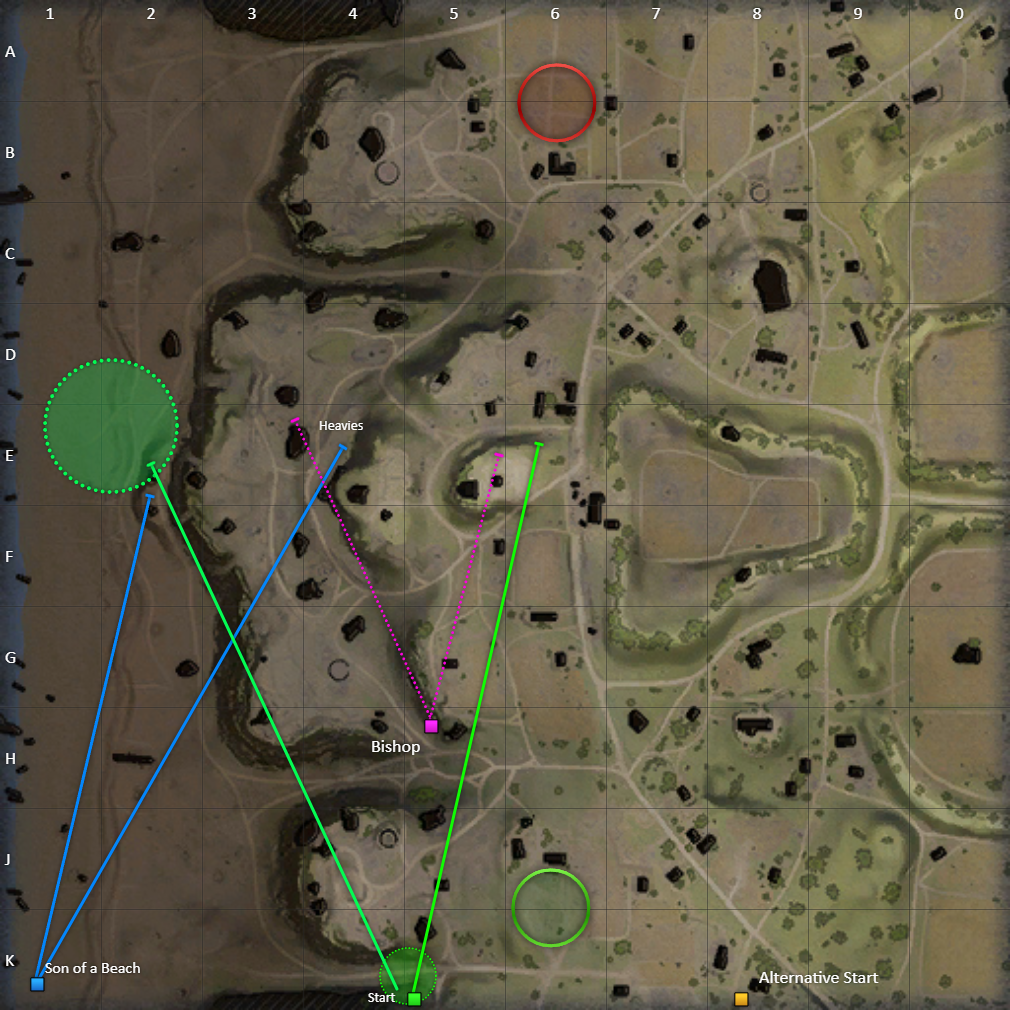
| Serene Coast North | Serene Coast South | |||||||
 |
|
 |
||||||
| Siegfried Line North | Siegfried Line South | |||||||
 |
|
 |
||||||
| Steppes North | Steppes South | |||||||
 |
|
 |
||||||
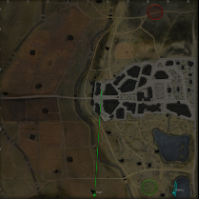
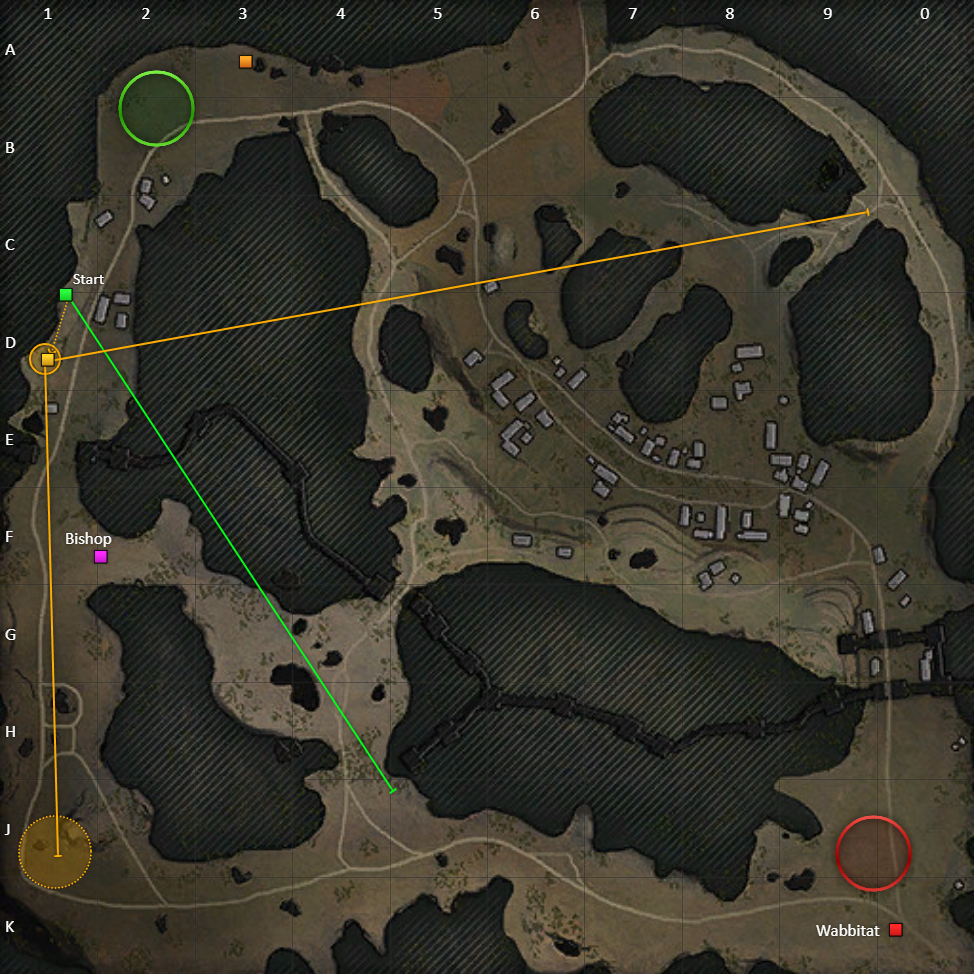
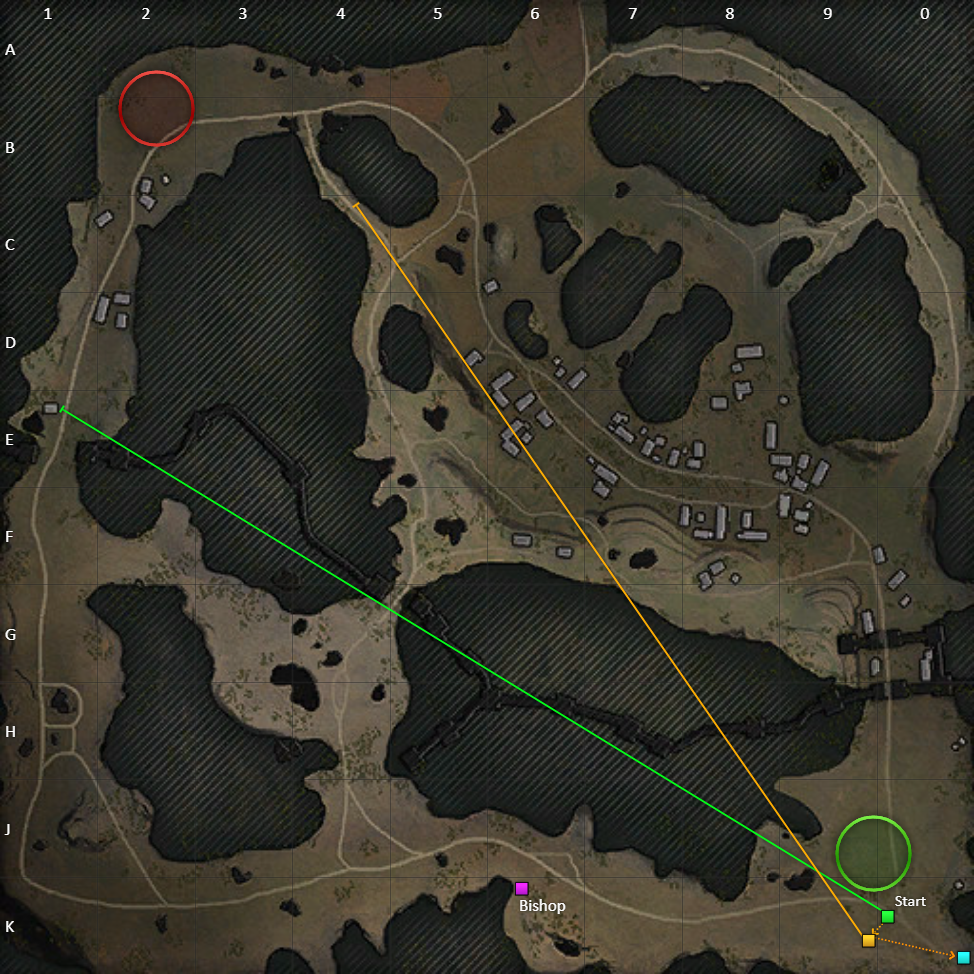
| Studzianki West | Studzianki East | |||||||
 |
|
 |
||||||
| Tundra North | Tundra South | |||||||
 |
|
 |
||||||
| Westfield South West | Westfield North East | |||||||
 |
|
 |
||||||
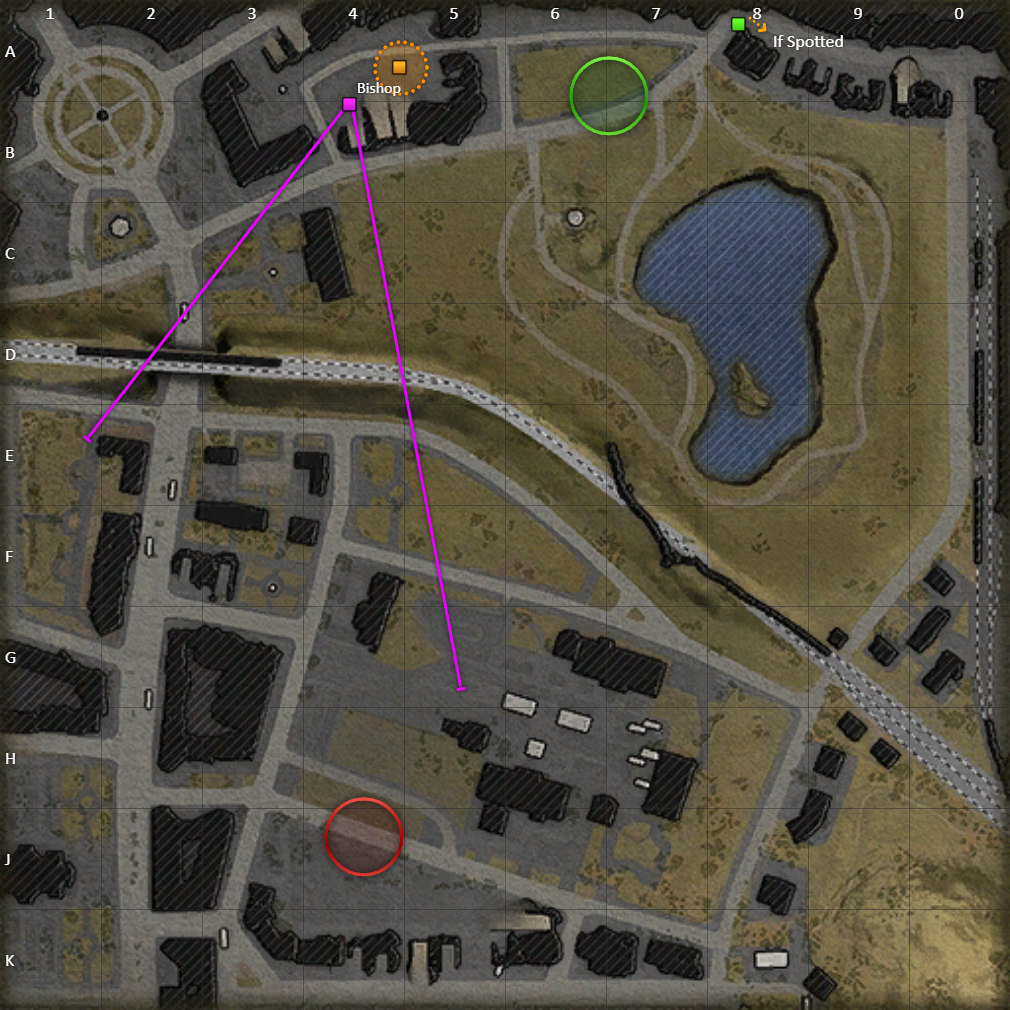
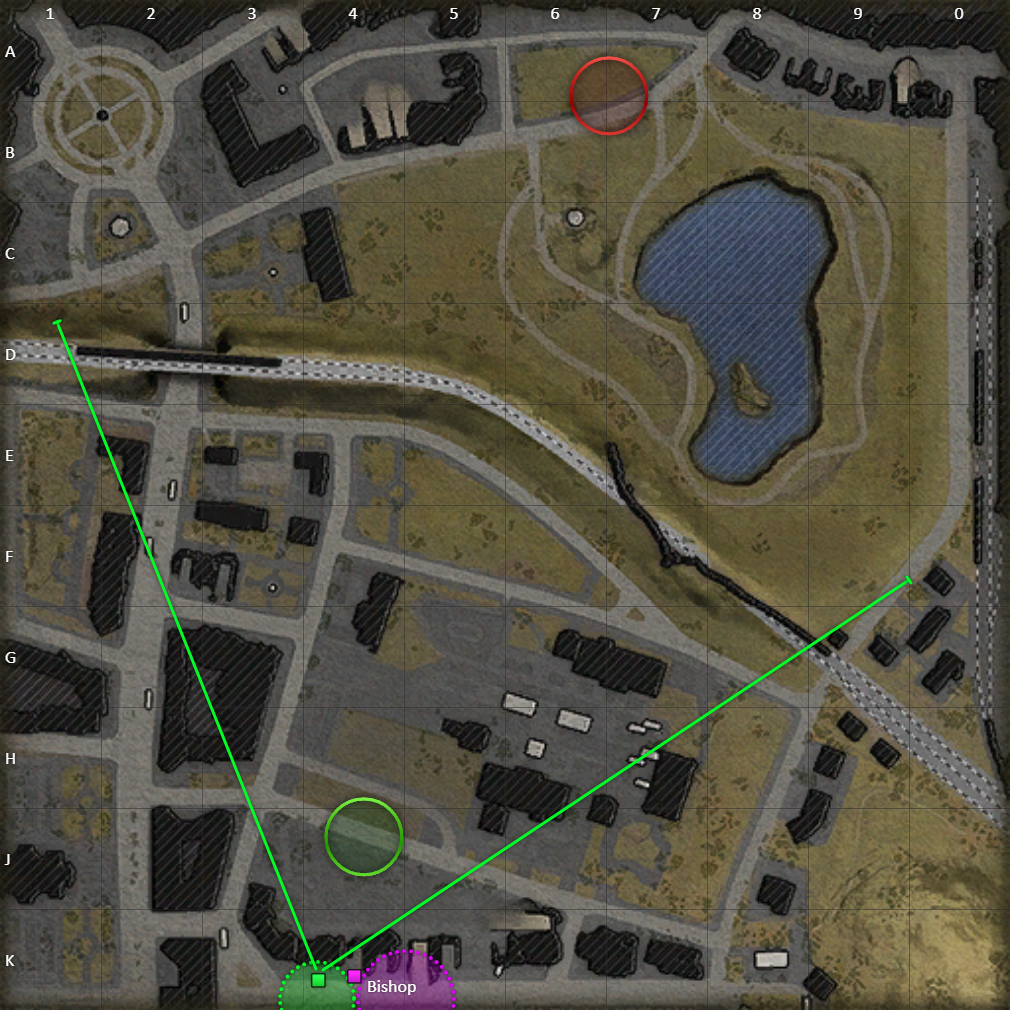
| Widepark North | Widepark South | |||||||
 |
|
 |
||||||


